I’ve been on a brioche kick. Thanks to PDXknitterati, I have mastered much of the new nomenclature of brioche, I’ve been on a kick to do a lot of it to cement it into my brain. Keep in mind, I’ve been knitting brioche since I discovered the “Built for Comfort Hoodie” it in Vogue Knitting’s Winter ‘98/‘99 issue (Vol. 16, No. 3).
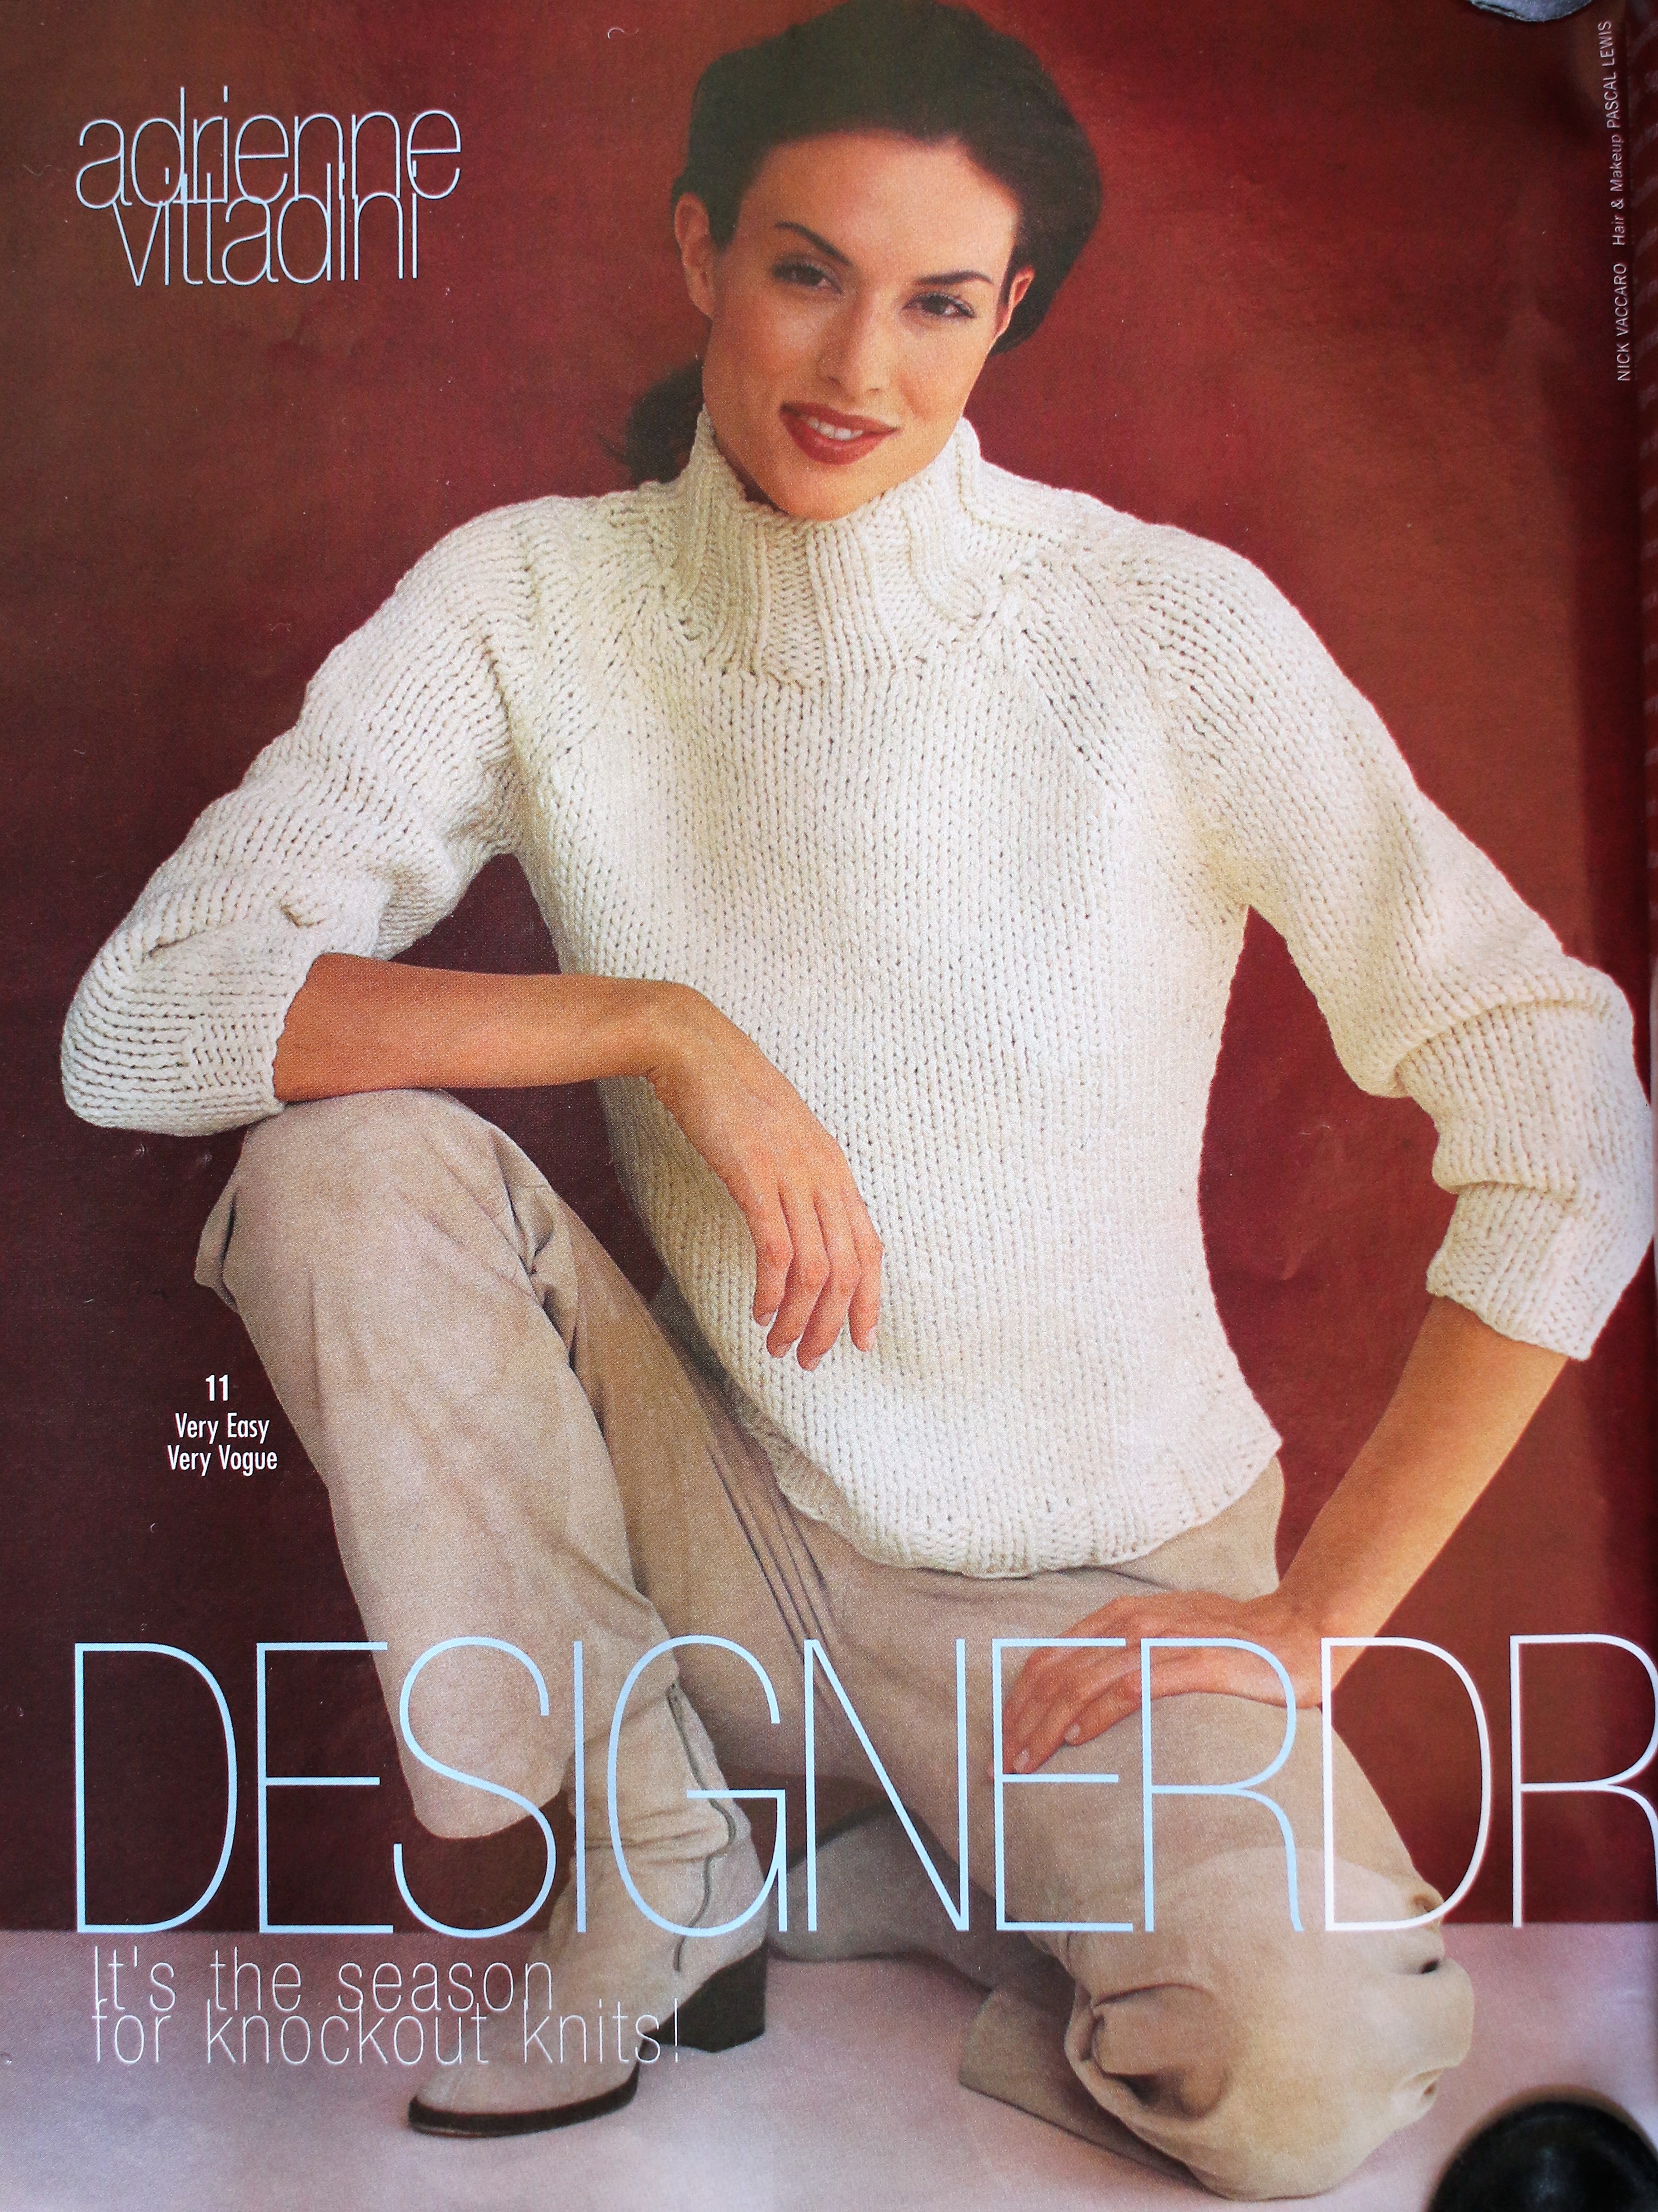
I’m currently knitting another sweater from the same Vogue Magazine issue: an Adrienne Vittidini Turtleneck Pullover. I’ve knit it once before (my sweater is the example in Ravelry). This time I’m dressing it up a bit with some furry yarn: Bernat Marmot and some vintage Brunswick Germantown Worsted.
Cotton Raglan Mock TurtleneckPicture from Vogue Knitting MagWIP Turtleneck Sweater
What I think I’m trying to do is make my items seem simple to do by repetition. But it’s not working, because right now all I can think about is doing a *really* simple project. Something to cleanse my knitting palette.
Do you ever feel like this? And if so, what do you do to get your maker mojo back?
Have you noticed that you’ve stopped wearing an older sweater?
Maybe you feel like you should wear newer ones you’ve knit. Or maybe there’s something, and I know I hate to admit this, that hasn’t held up as well as you’d like.
Many years ago I knit an Einstein Coat. I loved it when I saw it on the pattern designer at a Stitches event and it was very simple to make. The only thing I didn’t like about it was that it was very boxy. So, I made a fitted version. When you alter a sweater pattern, other things can happen. If you are interested, you can read about those foibles in this blog.
Over the years I’ve noticed that more and more, the coat gaps at the button band. Had I knit the sweater as written, this would be less noticeable. But in reviewing others’ results (there’s almost 1500 examples), I’m not alone. A coat knitted with chunky weight yarn is heavy and, as a result, stretches. Over time stretching is more pronounced around the buttons.
I tried just tightening up the buttons, which helped (and I recommend). But it didn’t fix it completely. Others added a button band and/or moved the buttons further in. This can help, but what if you no longer have the same yarn? What if it’s discontinued?
Not wanting to only wear it open, I contemplated frogging it. But then I remembered how much time it took to make it. Hands down, it’s the biggest garment I’ve ever knit. It’s so big, I often I use it for a lap blanket.
I recently fixed shaping issues with a new sweater by using I-cord, so I thought it might be worth trying it on an old one. When I fixed the new sweater I’d also run out of yarn, so I chose a contracting color. Since i-cord is a finished edge, it looks like an intended design feature. You can read more about that in this blog post.
I started with 3 stitches, but that didn’t wrap around the edge well enough for such a thick fabric. I then tried and stuck with 4, but if I were to do it again, I might use 5. The video I used to get started was this one from Purl Avenue. I watched several, but many were for i-cord bind offs or doing it as you go, not adding it to a finished edge.
Not only did it give me another inch between the buttons and of button band, it shored up the edge and held is straight even when fully buttoned. That made the stretch come from the sweater, not the edge. I also chose a less stretchy yarn (bamboo viscose), rather than wool, to make sure that it wouldn’t become lax over time.
I can’t wait to try this on something else!
And speaking of fixing old sweaters, I’m looking for a way to “loosen” a button band that’s too tight. If you have any ideas for that, I’m all ears. I didn’t knit the sweater (it was a gift), so I don’t the yarn and I’m a bit nervous about unpicking someone else’s work.
I love Hannah Fettig’s designs and I love Madelintosh DK, but sometimes I don’t love them together. The first time I knit, what I like to call the George Hancock (a combination of Georgetown and Hancock patterns in Home and Away) I loved it. But I also knit is from the bottom up, in pieces. What I failed to realize is that the structures came from the seams.
Bottom-up George HancockTwo books from Quince & Co. Home and Away and Madder 2Top-down George Hancock
The second time I wanted to try a top-down version, since everyone is always saying how you can get a better fit. To match my figure, I made a medium until the waist and then increased to a size large at the hip. This also made the sweater longer, which I also wanted.
I hoped the smaller size on top would also help compensate for the heavy garter collar, but it didn’t. The front hung in a deeply handkerchief hem and the back pooched out, making my hips look even bigger—the opposite of what I’d hoped.
To fix it I tried these in order:
Taking off the collar and knitting it with one size smaller needles (2 sizes smaller than the body)
Knitting side i-cord ties at the waist
Adding i-cord to every edge in a “sturdier” but “lighter” wool
The first one helped. The sweater fit a bit better, but it still was saggy in the front and poochy in the back. So, I moved onto #2, attaching two i-cords at the waist to tie it shut. No joy. I tried a leather belt but even that failed to hold up all that garter in a slippery Madelintosh.
The pattern was written for Quince and Co’s Owl, not a heavy merino superwash wool. It only worked in the bottom-up pattern because the seams provided structure.
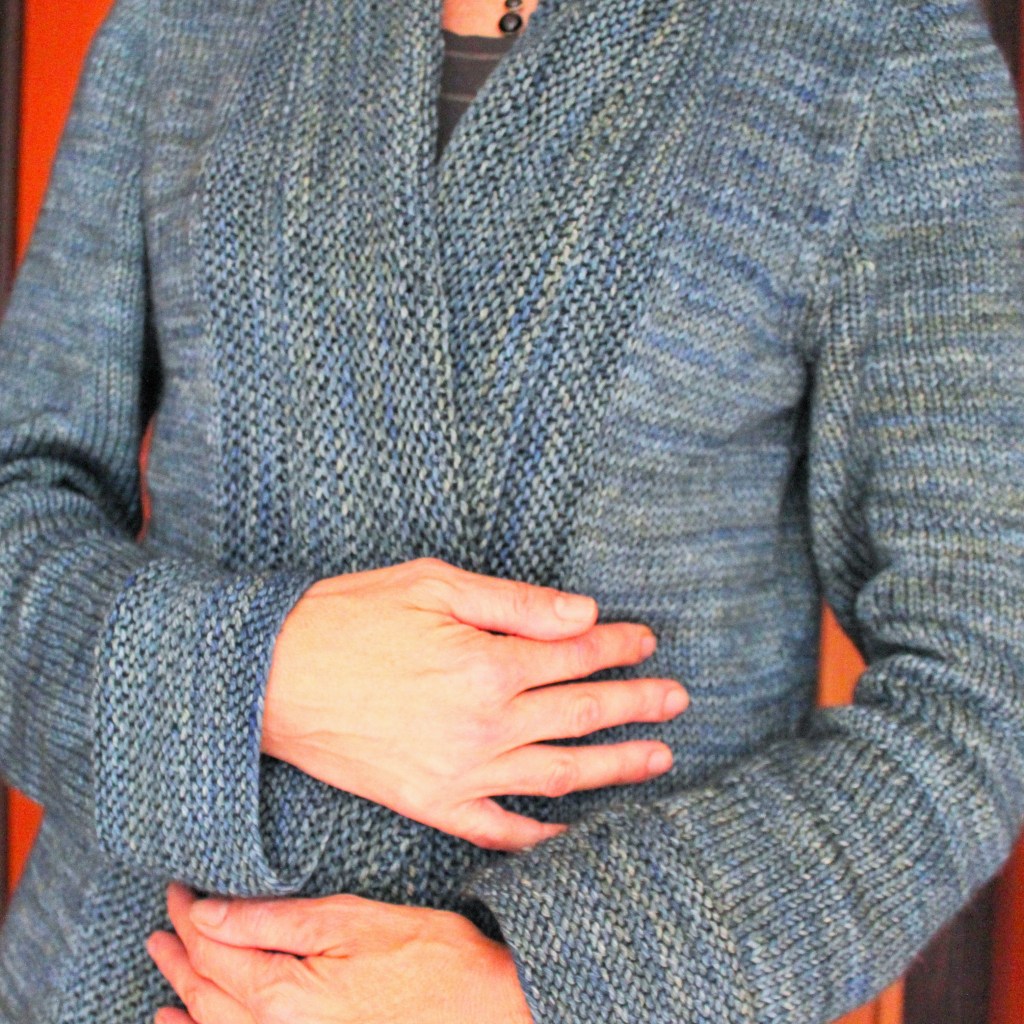
At Red Alder, one of the designers mentioned that i-cord was the “duct tape” of knitting. So, after the leather belt experiment failed, I took a lighter, yet stickier, wool yarn and knit i-cord around every edge—including the sleeves, which were too short because I ran out of yarn (bonus problem solved).
The i-cord directly onto the garment edges by picking up a stitch for every row. As I was going around the neck, I noticed it wasn’t having the right effect at the fitted waist, so I tore it back and skipped every second stitch 2” above and below my natural waist. This created fitting in the collar to match the body.
Lastly, I sewed up the bottom and created a top attachment to create a pocket. Because who doesn’t want a full-sized hidden pocket in their sweaters?
A Fitted Knit Jacket With a Pocket
I’ve frogged a lot of sweaters over the years—too many to count—including the sweater from the last blog. Sometimes frogging makes sense, but this time I knew that the pattern/yarn should have worked. I knew it was a structural fail, not a knitting fail. And when structure is what lets you down—i-cord is a potential solution.
One of the teachers at the Red Alder Fiber 2022 Festival said that i-cord is the duct tape of knitting. And while I’m sure that there are cases where this is true—it doesn’t fix all problems. For example, if you knit the armholes much, much, much too large–i-cord is not a solution.
Sweater patterns do not typically fit me. I have several things against me.
I’m curvy, particularly in the hip area.
I’m broad shouldered (wide across the back) and small breasted.
My rise from my breasts to my shoulder is long.
I’m almost 6 feet tall
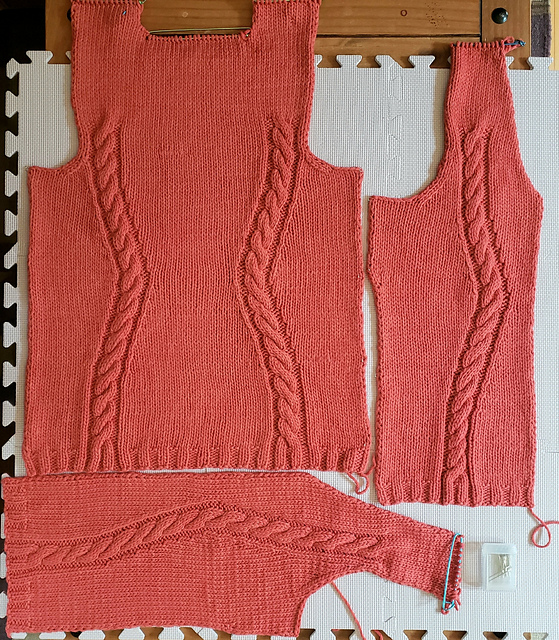
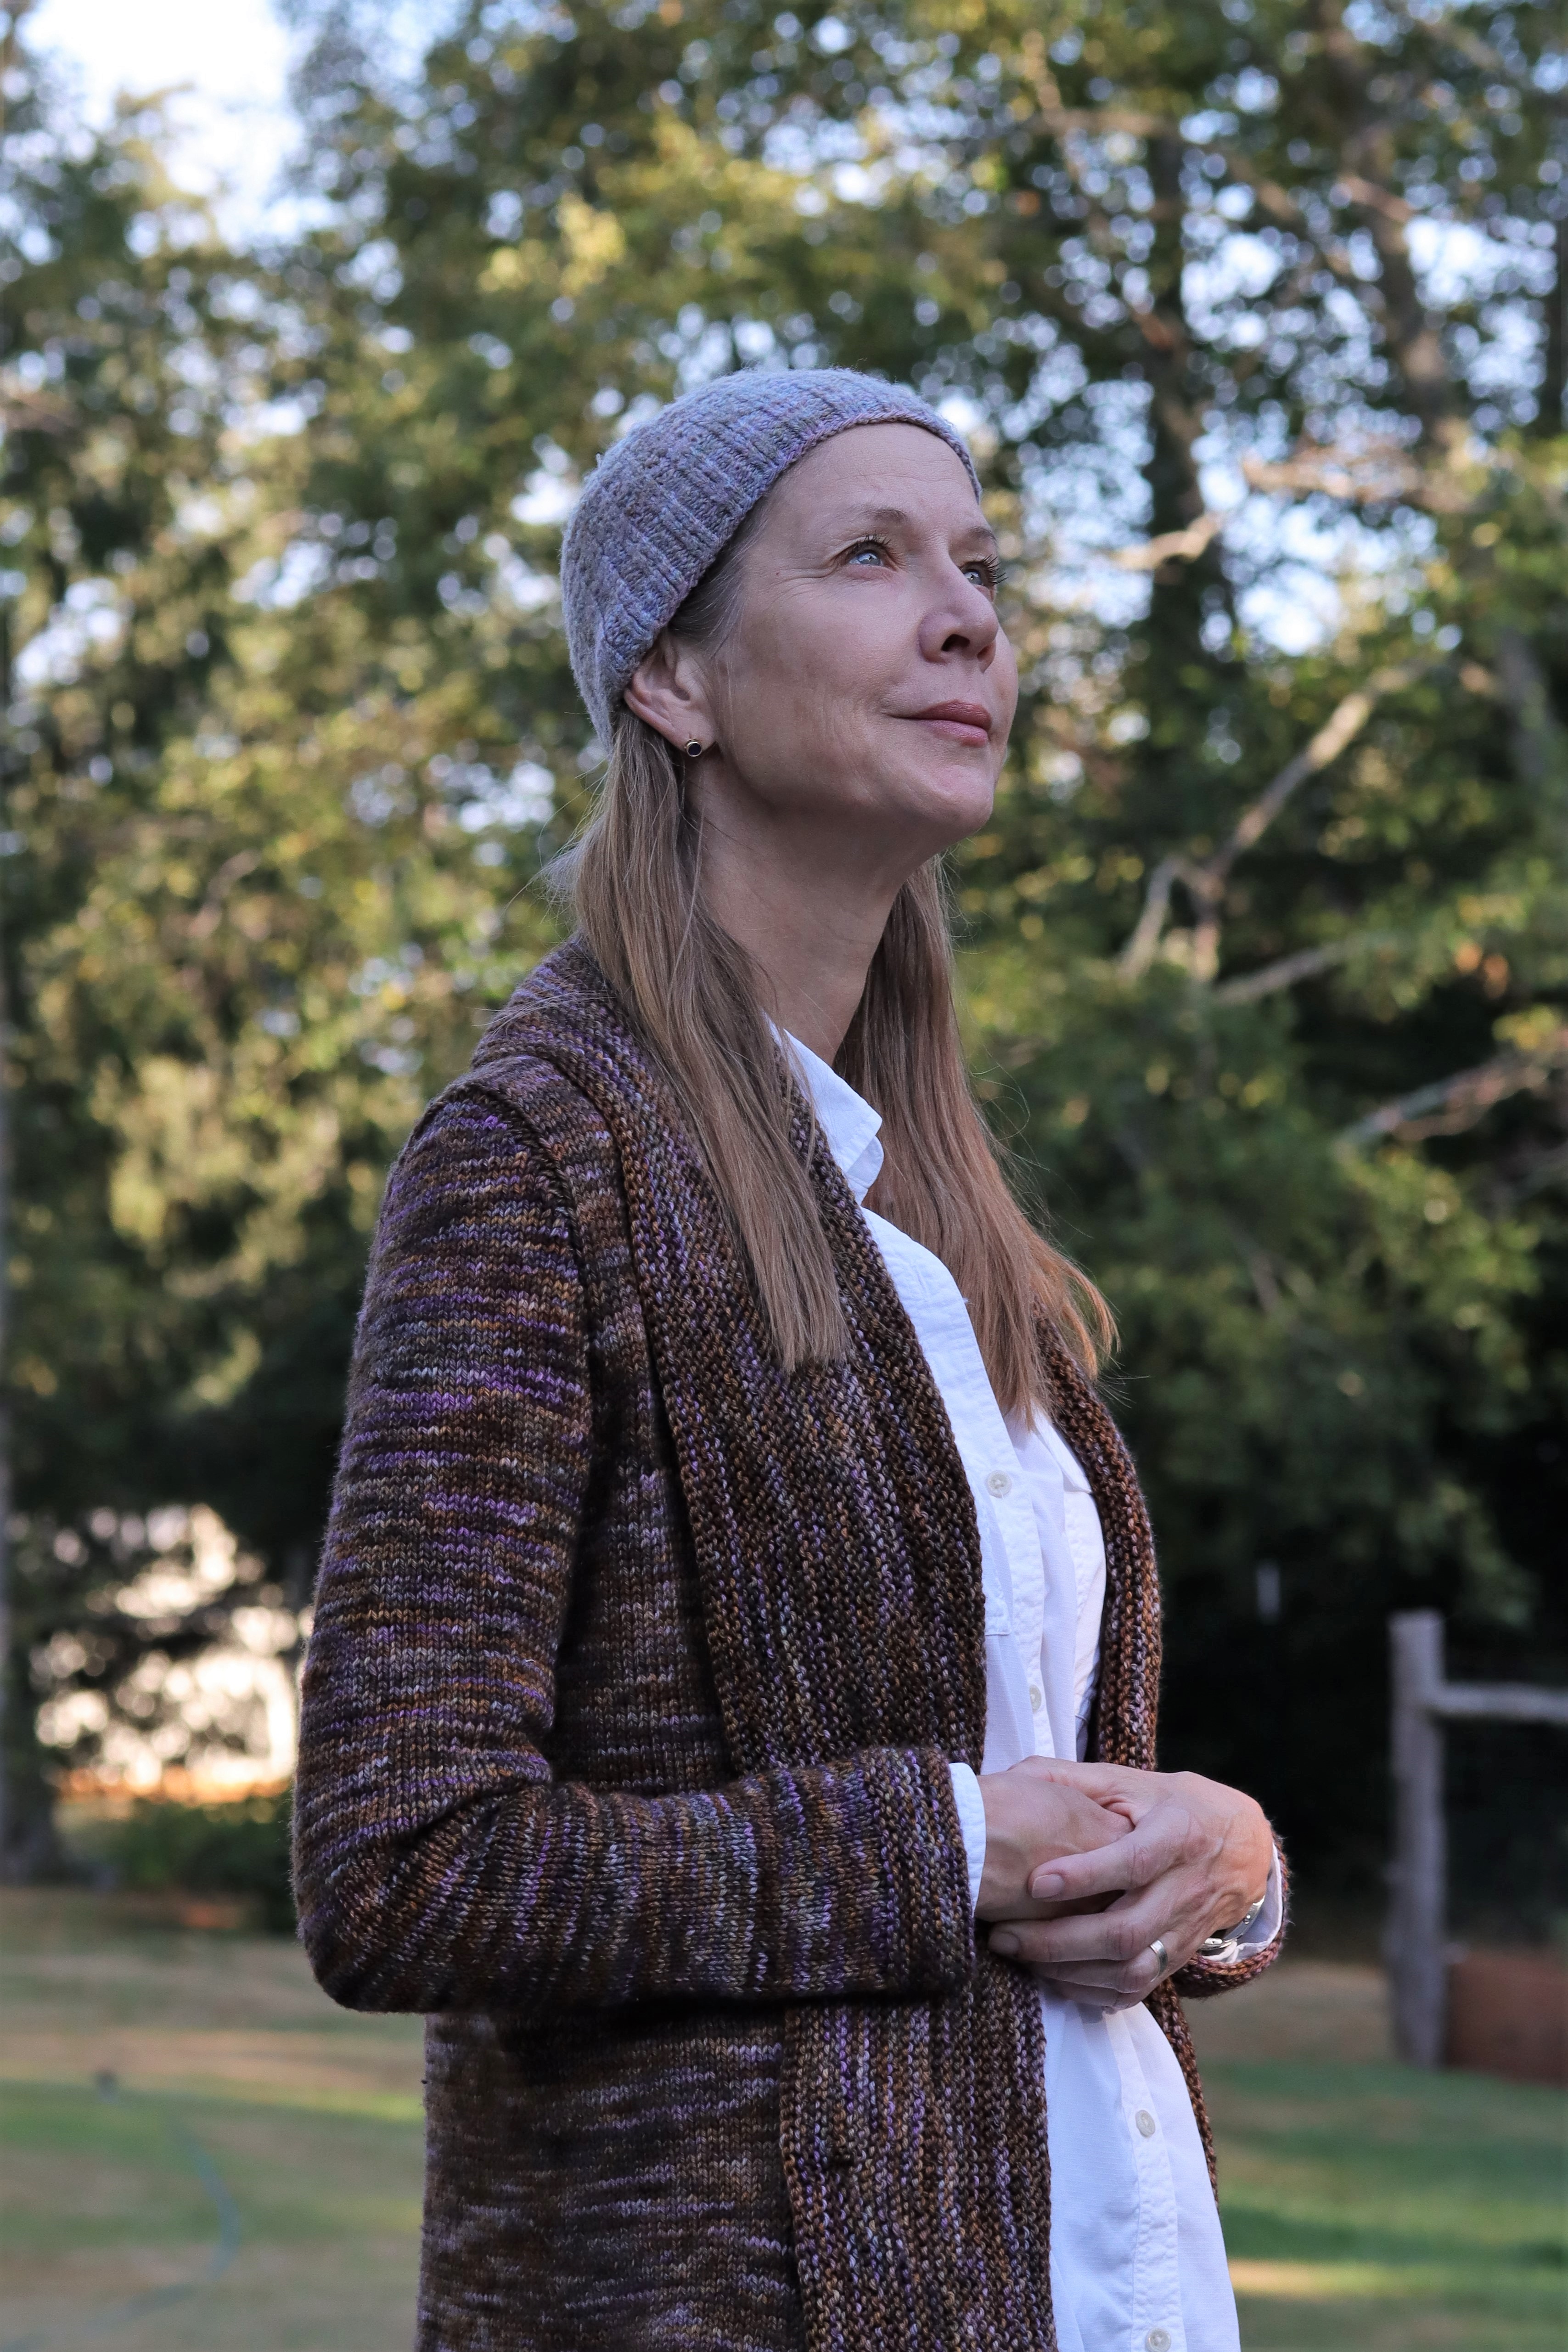
The pattern I used is Audrey, by Melissa Leapman—a beautiful, easy-to-read, quick knit. To make it fit me better, I made adjustments to fit my unusual body. The design is for someone less curvy than me—it has no fitting but gave the impression of hourglass figure—no matter what your shape.
To deal with my longer body, I knit a few more “straight” rows at the bottom. To deal with my long measurement from top of the shoulder to nipple, I did this same at the top of the body too. Unfortunately, while this worked well at the bottom, it didn’t at the top. I ended up with a huge armhole–about 4″ to large for my twiggy little arms.
I really, really should have cut my losses early and tore it out. Instead I blocked the pieces, sewed them together and knit the button band. The latter took two tries to sort out with my adjustments.
After three tries at the sleeves, Bottom up, then top down, followed by a hybrid (armpit short rows), I realized that no amount of fiddling would fix it. But given I tend towards the fixer end of the spectrum, I sallied forth.
And now?
I’m ripping. But that’s okay, I have all kinds of ideas on what do to (and not to do) to make it fix me in the best way possible.
I have cast-on-itis. I want so badly to cast on another sweater project, my teeth ache! This is because, at any given time, I like having a “menu” of projects on the needles. This generally consists of:
A pair of socks
A hat or scarf (or both)
A sweater
A throw or blanket; and (maybe)
Minor household items (rug, dishcloths, etc.)
There was a time when I had one (and only one) project going at a time, with other projects queued behind. The monogamy ended when I started knitting blankets because they are harder to do “in transit”. This led me to realize, I really enjoy having a selection of projects to choose from depending on my mood, where I am, and what I’m doing.
At present, I do not have a sweater, hat, or household item on the needles. And my closet is full of project bags filled with all the necessaries to get started. This is to keep me focused on completing at least one of my two WIP blankets. If I had my way, one of these I’d toss out—yarn and all.
It’s been years since I started the throw, which only gets worked on as a chore. I want to finish it and send it on, but it keeps getting stalled.
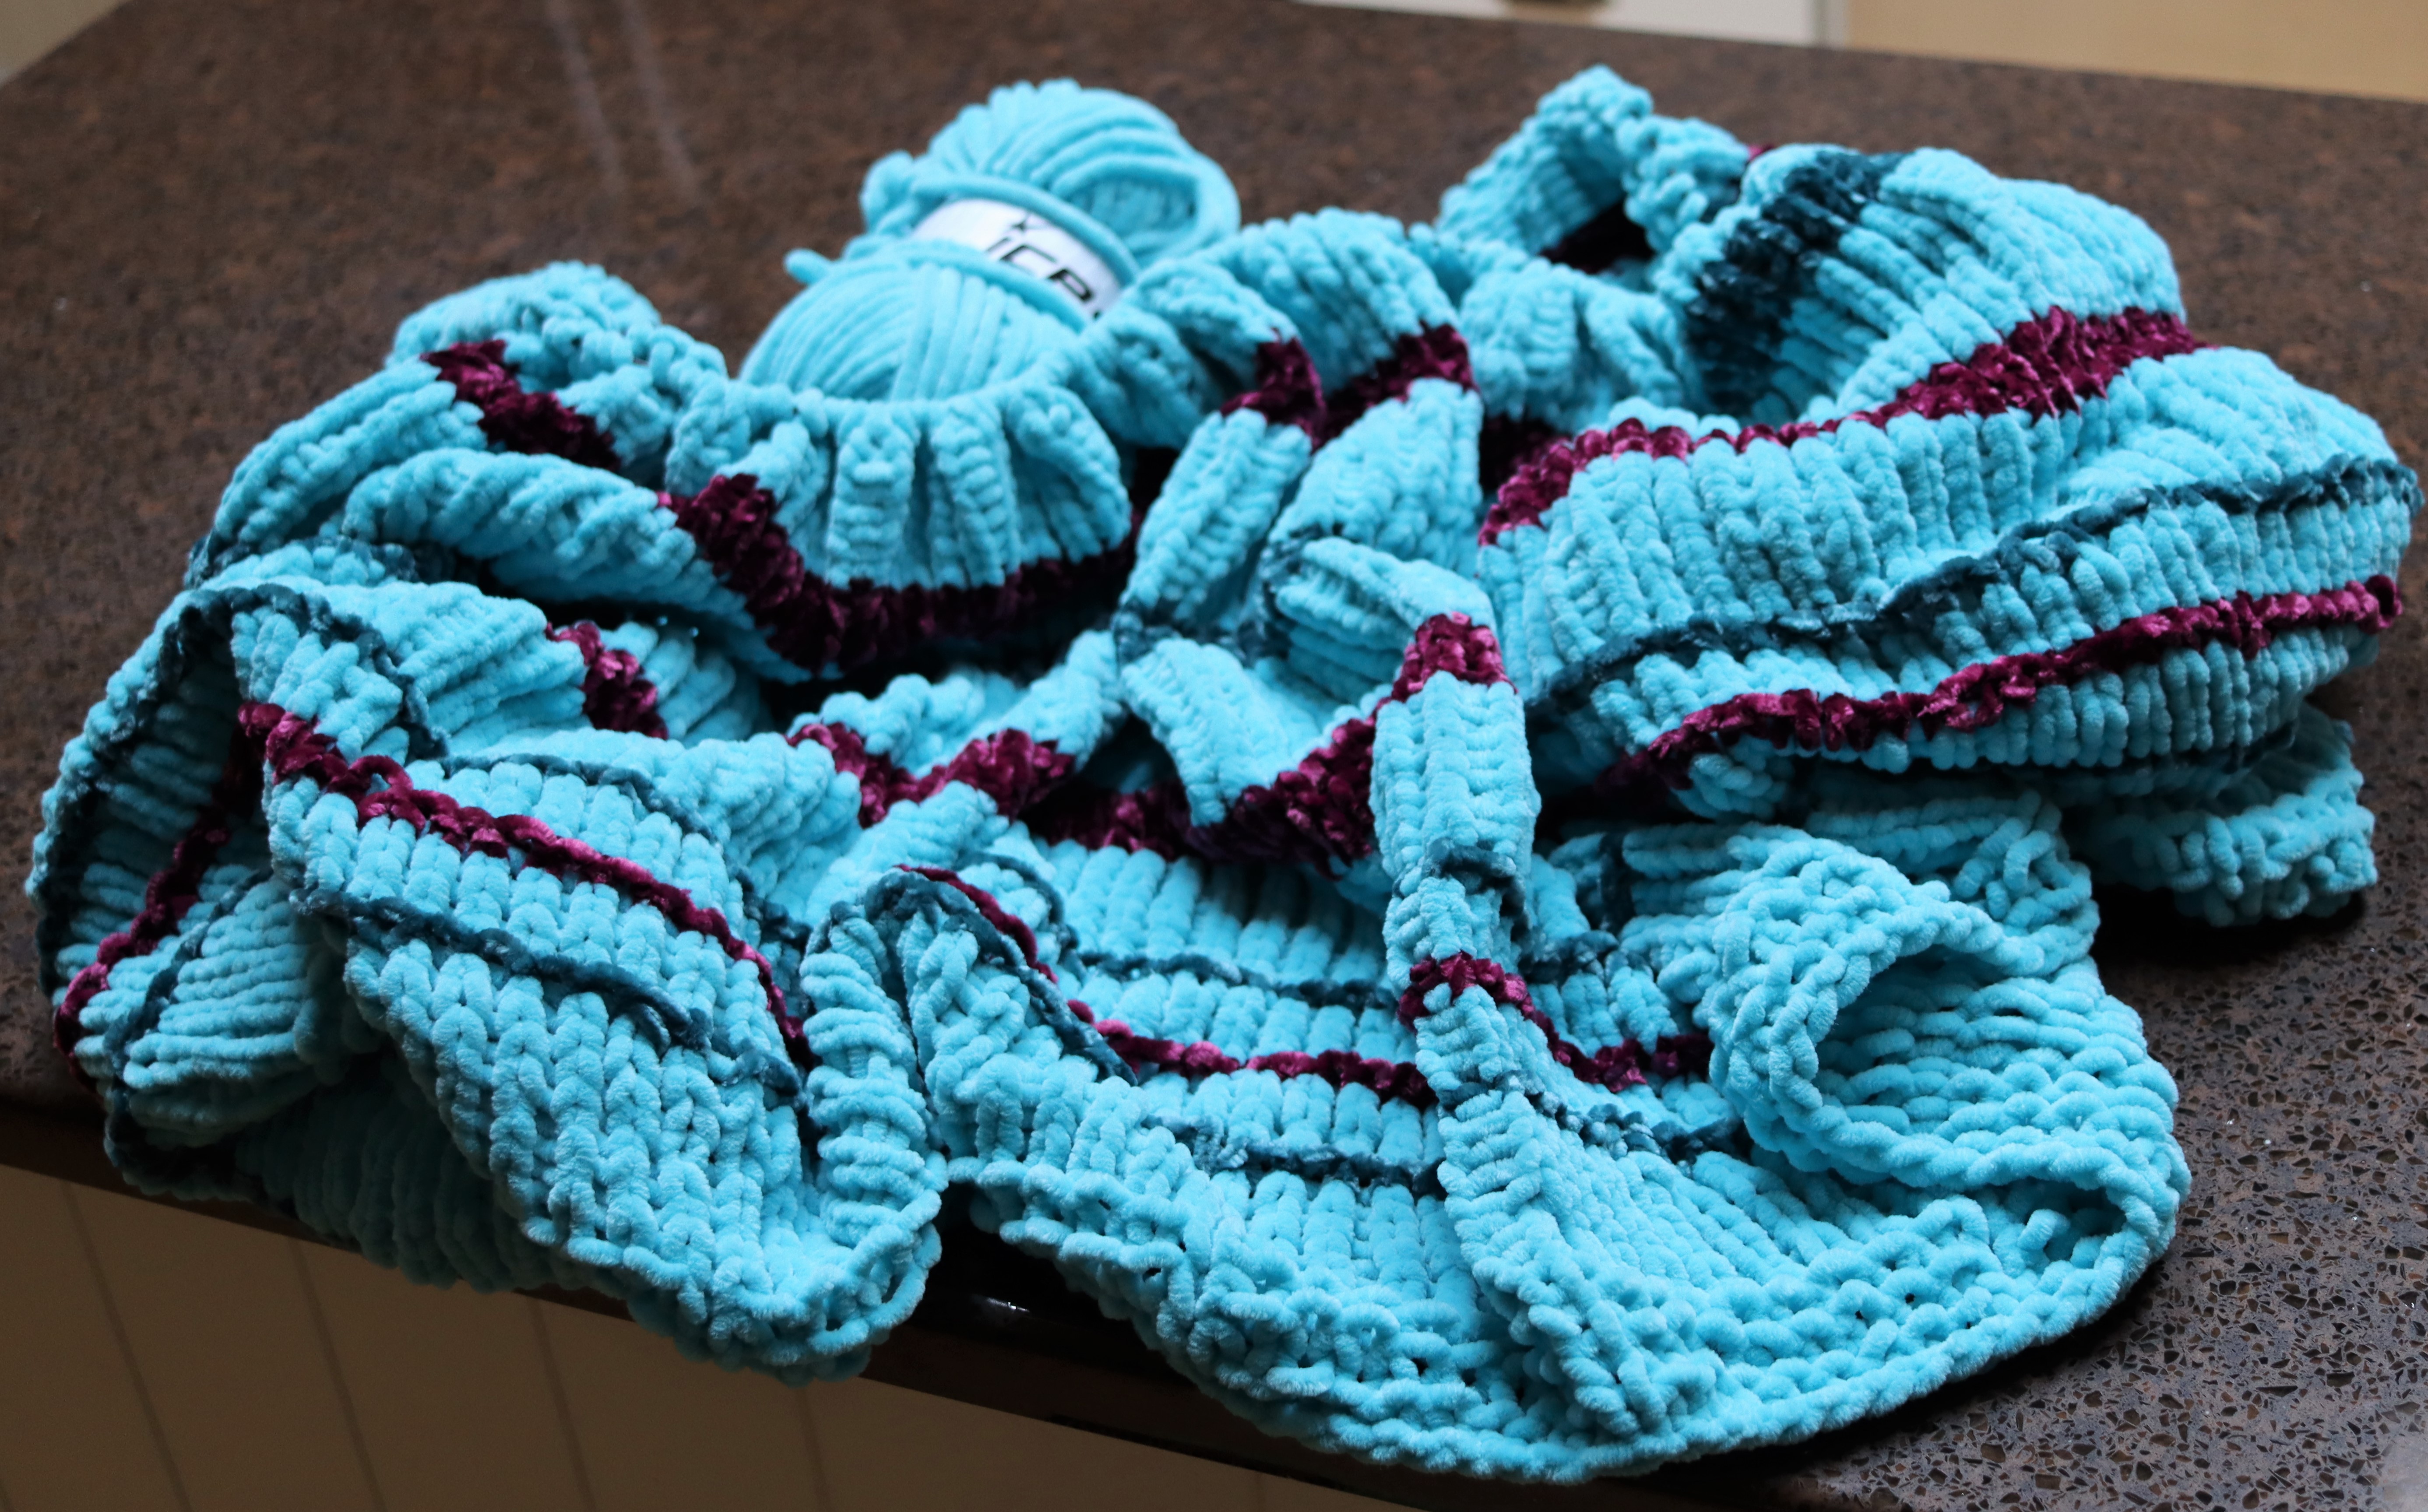
How I ended up here was I wanted to prevent my mother buying a pretty throw made of cheap, plastic yarn she saw in an art shop. It was obvious to me it was for looking at, not using. So, I asked her if she planned to use or display it. “Use it, of course!” *sigh*
I regrettedly I told her I’d make her something she could actually use. Unfortunately, mom went out and bought the same velour yarn and picked out a close pattern. And here we are, years later, her without a throw for her couch and me with a project I pick up rarely and reluctantly. Deep in my heart, I’m cetain it will have the same problems as the art shop blanket.
Velour WIP Blanket
Knitting for family and friends should be a labor of love. “Knit to order” is for people that do it for a living. In short, if the urge hits you to stop a person from making a bad knitted item purchasing decision you shouldn’t. Firstly, support to support the fiber artist and secondly for your own sanity.
Has this happened to you? Is so, what was the item and what did you do?
I’ve had a love-hate relationship with this sweater. I loved the first version of it. So much so, that I decided to knit another. The pattern was great. I loved the yarn I chose. Why not knit it in another color? The first one took just over 2 months—I started in mid-July 2015. I finished in early September.
Trying to do a seamless version of this
Shaped to fit me
The first one was bottom up. So, I decided the next would be top down. The first one grew—as Madelinetosh is known to do—so this time I’d make it one size smaller. I also wanted it to be just a bit more fitted to my shape and longer. All these things are easy to manage in a top-down sweater.
Fast forward to November 2017, I cast on and started knitting. I had other projects on the needles, so this wasn’t going to be a 2-month sweater. Also, I mostly knit bottom-up sweaters, so I was in ‘learning mode’.
My first problem came in February 2018 with the sleeves. This was a mental thing. I feared that I would not be able to match them as well as the bottom up version, when I knit them 2-up on the same needle. It’s a great trick I learned from a master knitter. So, I set the project down until I could muster the courage to try and figure out how to assure myself they’d be perfect.
Perfect. That word was the issue. And it is something I’m working on with myself–to be okay with not perfect.
In November 2019 a group of other island ladies (friends of Island Wools) on Facebook started a “Finishers Club” for people that had too many WIPs. After sitting on this project for nearly two years, this was the one I put forward for me to finish in lockdown.
The sleeve problem was pretty easy to solve. I used magic loop. In retrospect, this was a no-brainer. I knit two up socks all the time, so why not the sleeves in the round?
The next issue I discovered was after I thought the sweater was done—I’d failed to use a smaller needle on the collar and it was HUGE.
This collar is not for the faint of heart. Sure, it’s garter and therefore boring. But it’s also 270 stitches. Each row is as wide as an afghan. I “finish” only to find that the collar hung to me knees. I looked at various ways to “fix” it. None was viable. The collar had to come off.
This is when having a group helps. You told people you’d do it and that motivates you to keep going, especially when you see them knocking off theirs. I did work on other WIPs in the meantime (including an afghan). But this was the “call out” project. So after I unknit the collar. I immediately (okay, more like three weeks later) cast back on with the right-size needle.
This problem isn’t about perfectionism, it’s about the reason I wanted a second sweater of the same type. I knew that if I didn’t fix it, I would not wear it.
Having groups to keep you going is a boon. And lockdown helped too.
What gets you started again after you’ve put something down?
Since the global pandemic hit, I’ve noticed that lots of folks have increased their online content production. How I know this is that I’ve been consuming it (many thanks fellow bloggers!) rather than creating it. The fact is, I am in hibernation.
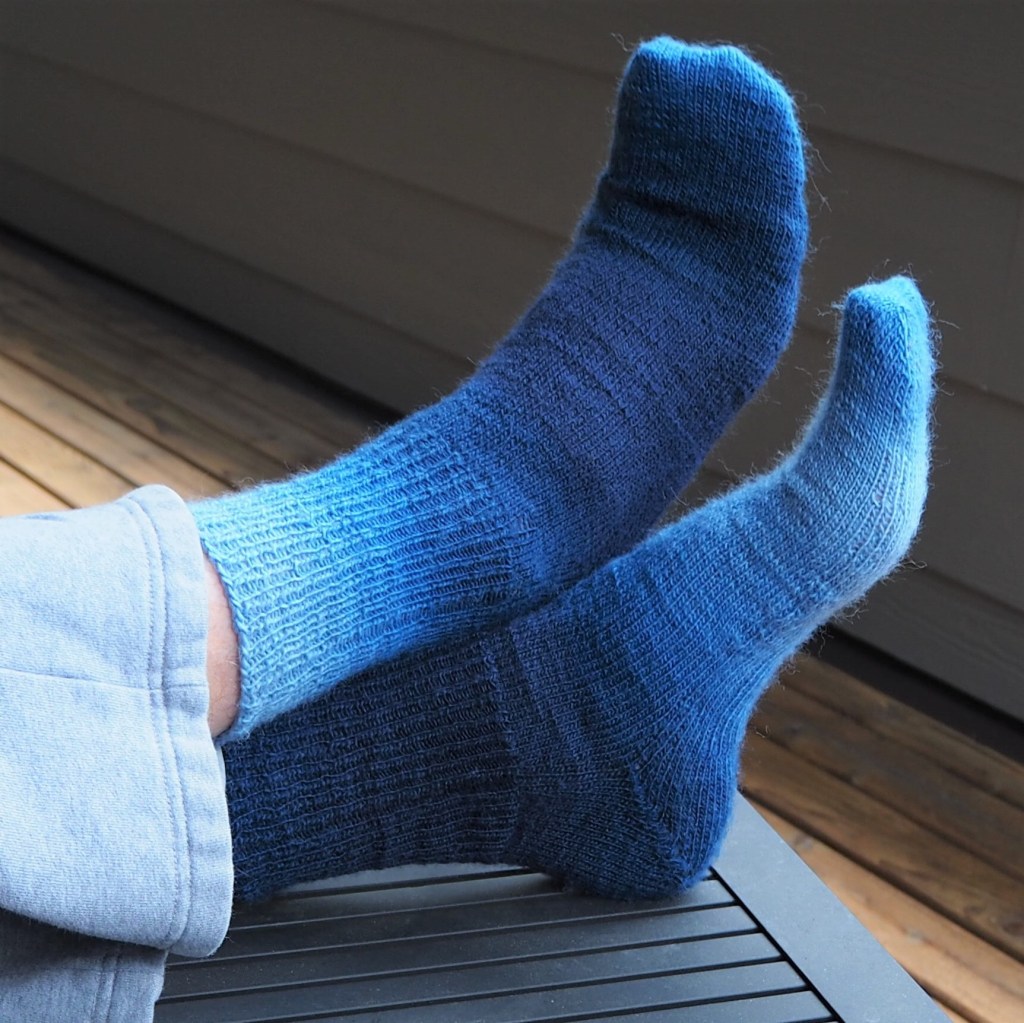
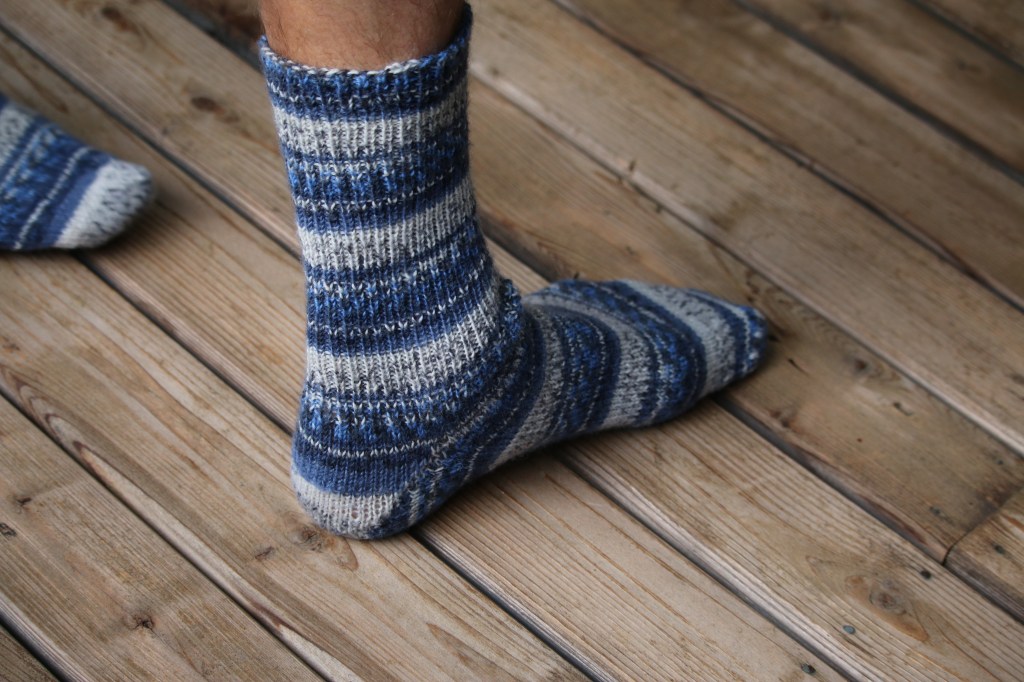
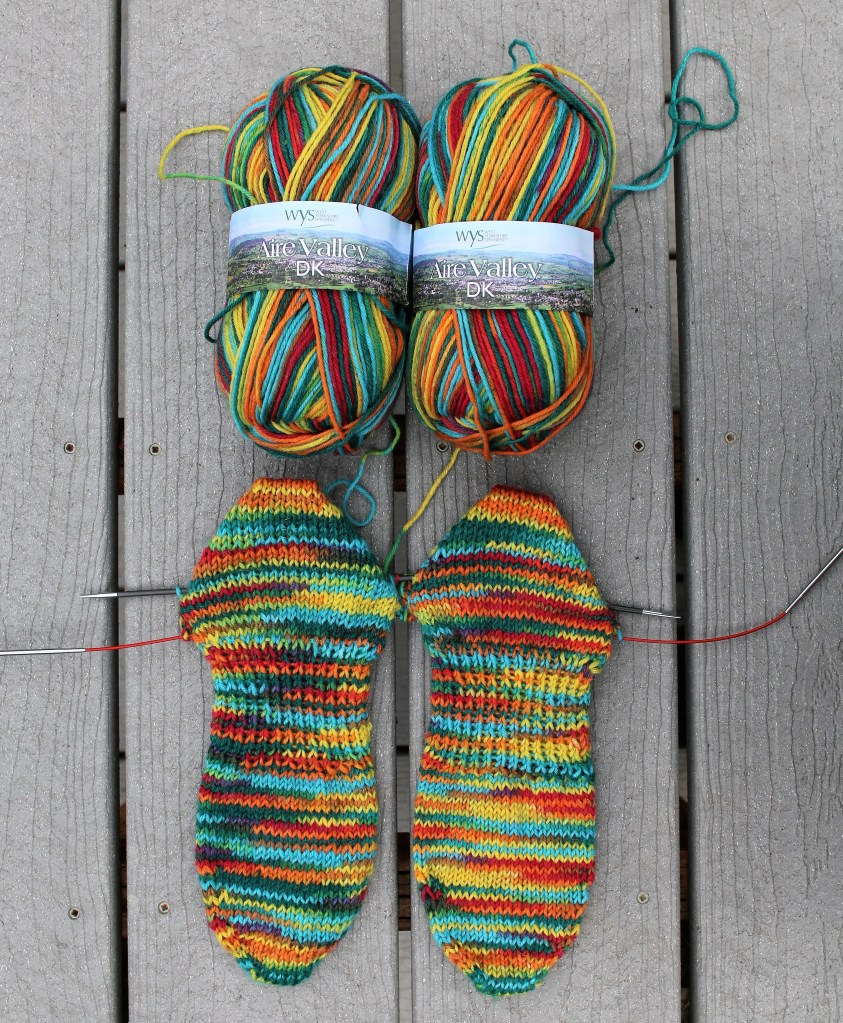
I’ve been spending a lot of time attempting to learn new things. Socks, which were formerly my bane, are front and center—specifically sock heels and stretchy bind off techniques. When you start to focus on the details, it’s official—you are a sock knitter. I’ve made so many pairs, I stopped using patterns and now cast on the next pair immediately after I bind off the finished one.
West Yorkshire Spinners Colorful Socks
Schoppel-Wolle Zauberball Ultra-fitted Socks
Jawoll Variegated Socks
Jawoll Stripe Socks
Felted Wool Socks – Vintage Yarn
Regia Design Striped Socks
On the Needles: Jawoll Tweed Socks
Hibernation Knitting Projects
I’m not a fan of heel flaps. I prefer the “store bought” look of short row or afterthought heels. Unfortunately, these have a myriad of issues, such as holes, complexity, etc. But I’m getting ahead of myself. I have quite a bit more testing to do before I post on this topic, which means my family is getting a lot of handmade socks these days.
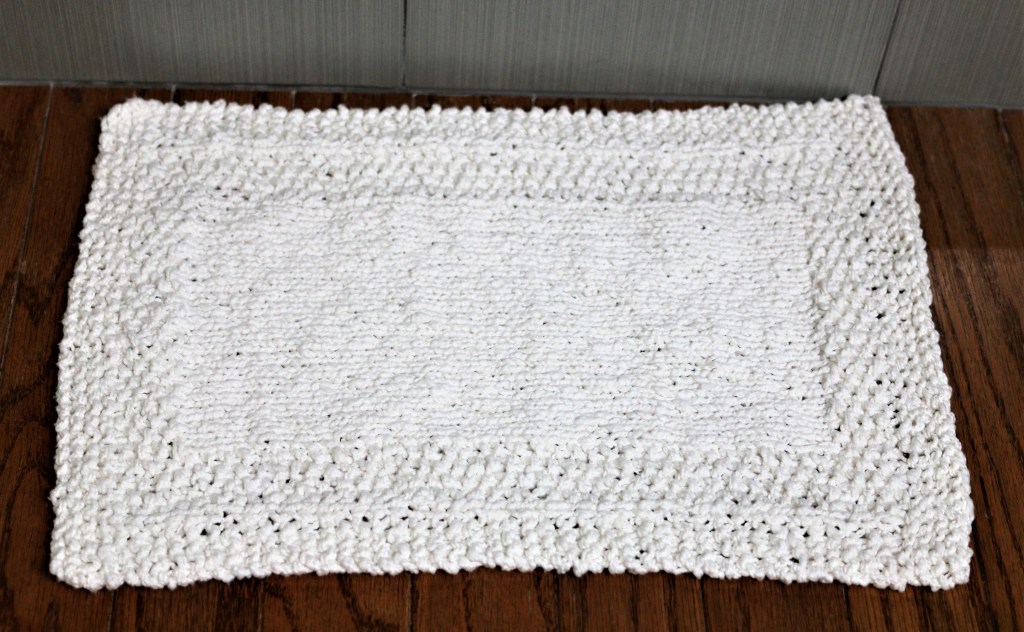
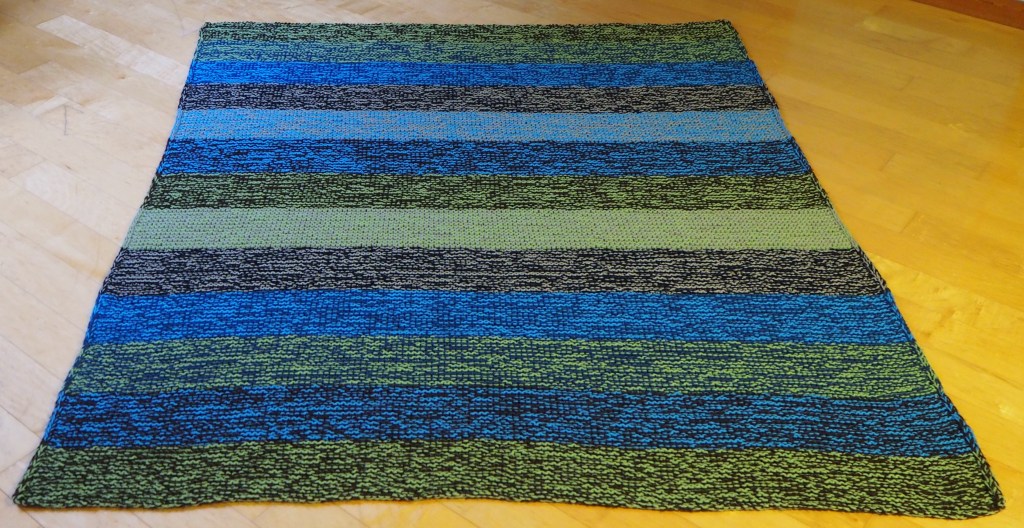
The other thing is I’ve been focused on “comfort knitting”. Things that don’t take much thought (rectangles!). It’s like the anxiety of COVID-19 has me wanting to do less stressful projects. I started with pillow slip covers, bathmats, hand towels and dish cloths, but have graduated to exclusively knitting afghans.
Pillow Slip Covers
Tenderfoot Bathmat
Pillow Case
Tenderfoot Bathmat for me
Floor rug for potty
Garter Squish Afghan
On the Needles: Velour Beachcomber Afghan for Mom–She Picked the Yarn
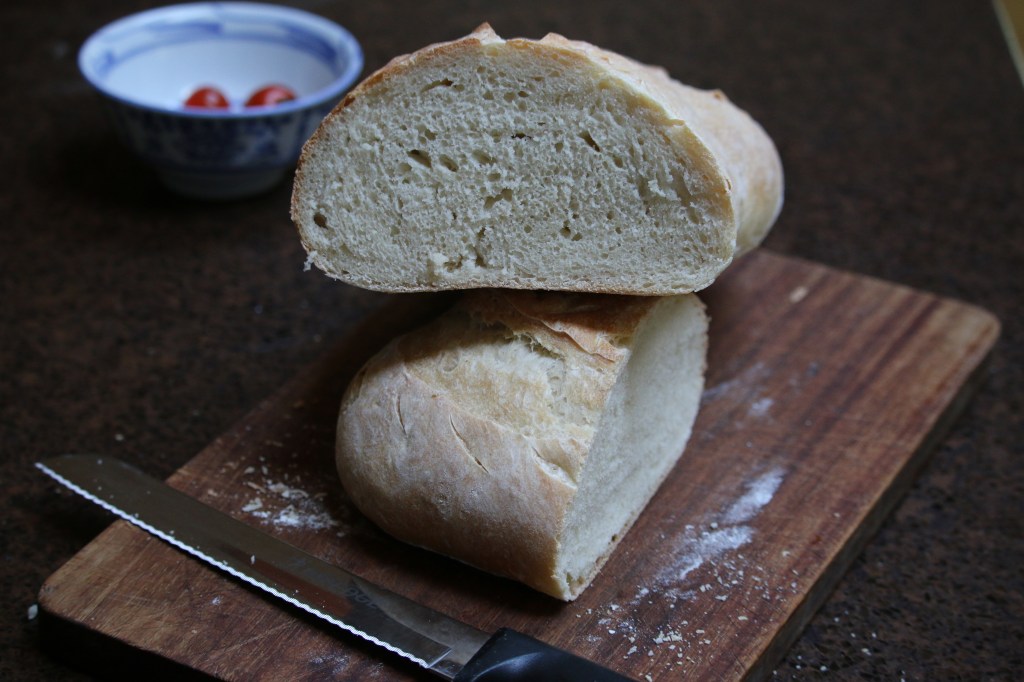
Other things I’ve been learning is making sourdough products and wildlife photography. Both of which have had mixed results. Like socks, I’m dialing it in a bit more with every flat loaf of bread and every blurry bird photo. 😊
Seagulls Eat Seastars? Who knew!
Sea stars and cucumbers
Sourdough Bread with palm tree pattern
One of the better bread loaves–partially risen
In the absence of interacting directly with other people, language (in this case writing) has gone into hibernation. Thankfully, creativity has not.
I miss travel and seeing friends. This too shall pass.
I own and have used almost every type of interchangeable needle set, from square to round, from carbon fiber to wood, from standard length to shorties. And many of these sets of needles, over my many decades of knitting, have been put to heavy use.
The biggest difference? Durability.
Yes. Knitting needles DO wear out. They break, bend, dent or become unusable in some other way. Some much more often than the should.
Why do a guide?
On a recent post in the All Free Knitting Community group, a new knitter asked which were the best interchangeable circular knitting needles. Because of the expense, she didn’t want to get it wrong. And like most knitters transitioning from new to intermediate, she realized that interchangeable can be a more practical and space saving way to go.
There are lots of reasons to select one or another set, which is why I own so many. But since cost was a factor, my recommendation was for a lower priced, but fairly durable set–not the most expensive, such as KnitPicks’s Short Radiant. Then when they wear out, she could upgrade.
Lots of thoughts went into this recommendation—from practical to psychological.
Why wood? Wood has more “grab”. The yarn stays on the needle better than other materials making it easier for newer knitters to avoid dropping stitches. And they are warm to the touch.
Why shorts rather than mid or full-size needles? Shorts, usually around 3” or less, provide versatility at the expense of speed. Longer needle shafts make it harder to do smaller work (socks, collars, etc.). And shorter is more durable (less chance of bending or breaking).
Why Knit Picks? Price and a handy, see-through carry case.
Buyer’s Guide
This guide will only be covering standard needle types. Most of these manufacturers offer lace and various length options, so those factors are preferential rather than about durability and price. The prices are as of May 22st, 2020 and they are based on the number of needle pairs in the set—not whether they come with notions, have a nice case, etc. Value should be placed on the needles, rather than the extras.
Knitting needles are a bit like wine. The price does not necessarily match quality and what matters most is whether you like it rather than what comes with it (it is what’s in the bottle, not on the label).
Here’s a chart of how the major needles (I have used) stack up based on my research:
* Price is gotten by dividing the total cost by the number of needles in the set
My Metal Preference: Hiya Hiya or ChiaoGoo
If you like metal needles, I recommend HiyaHiya’s—even though they seem fairly high-priced “per tip”. What makes the cost effective is they work with standard cables. If money were no object, I would choose ChiaoGoo. They have raised the bar with knitting needle technology by changing the material in the cables. And those cables are amazingly great! The problem is that they don’t work interchangeable with other sets—not even other ChiaoGoo sets—meaning you have to buy a full set of cables with each set you buy. I guess that’s why they are called “Premium”.
I do not recommend addi’s given they are most expensive AND of the high-end needles, least durable. I find the “turbo coating” peels or flakes off under heavy use. And while I carry Knit Picks with me almost everywhere, it because I use them as a “notion” rather than for projects because I find the cables loosen during knitting (both wood and aluminum).
Natural Materials Preference: Knitter’s Pride Dreamz or KnitPicks
For the price and utility I prefer Knitter’s Pride. They are really my “go-to” needle, mainly because they stay screwed together when I knit. Knit Picks seem to come loose while I knit, but not as often as KnitPro’s Cubics. I love a square needle for stitch consistency, but it has to stay screwed together!
I did not test HiyaHiya’s bamboo needles, only Clover’s Takumi. And from using them, my feeling is that bamboo should not be used as a knitting needle material—ever. Bending instead of breaking is not beneficial when the ends fray and snag yarn under heavy use.
Best of Both Worlds: Knitter’s Pride Karbonz
If I have to select one and only one set, it would be Knitter’s Pride Karbonz. Unlike metal, carbon fiber is cool, but not cold to the touch. And after snapping my wood needles and bending several metal ones, I enjoy that they take a licking and keep on knitting. Hands down–they are the most durable needles I own. And though the cables aren’t even remotely as nice as ChiaoGoo’s at least I can reuse those from other sets. My ideal set would be if Karbonz would work with a ChiaoGoo cable.
Karbonz do have one downside (besides being expensive)–they feel slower than my woods or aluminums. Though I admit I also seem to be more prone to errors because of mindlessly zooming along. So in the end, giving all the tearing out, they might just help me finish sooner.
Using ChiaoGoo needles in tandem with Karbonz. I prefer the stronger, slower Karbonz to turn the heel.
Final Thoughts
I hope you will find this useful. It was helpful to me to (re)test my sets for this blog. Doing a side-by-side comparison really helped me figure out which needles were best for different types of projects.
And that really is the crux. No one interchangeable needle set can do it all. But are best suited for some than others.
If I l’ve missed a set you’d recommend, I’d love to hear from you.
Many patterns specify a yarn and number of skeins, rather than yardage making substitution difficult. This post is designed to help you use vintage or any yarn on which you have little information.
I’ll be outlining ways to get yarn weight, yardage and care in order to make informed substitutions. This is especially relevant to me, since I inherited a huge stash of wool from my grandmother when she forgot how to knit when she developed Alzheimer’s.
It seemed like I had a lot of this yarn. My grandmother had 17 skeins (!) in her stash. But that turned out not to be the case. They are on cardboard spools–so there is more air than yarn. I’m also dealing with three different dye lots and minor sun damage. Grandma was a penny-pincher and often bought remainders, smoke/fire damaged and sun damaged, and unlabeled yarns at bargain prices. This is only one example of many “problem children” from her stash.
Getting the Weight:
What you will need:
Yarns of several weights that follows the standard yarn weighting accepted today. I generally rely on Cascade Yarn for this, but any major yarn manufacturer will do.
Appropriately sized needles for the weights.
Methods:
Twist method: I learned this several decades ago in a class, I believe, Lily Chin taught at one of the early Stitches West. This is where you take a yarn that is a good standard for different weights of yarn.
The trick here is to have lots of “known good” weights of yarn. I have loads of leftovers that work perfect for this.
You hook the yarns around one another and then twist in opposite directions. If there is a “smooth” transition when you run your fingers across the join, you have likely found your closest yarn weight.
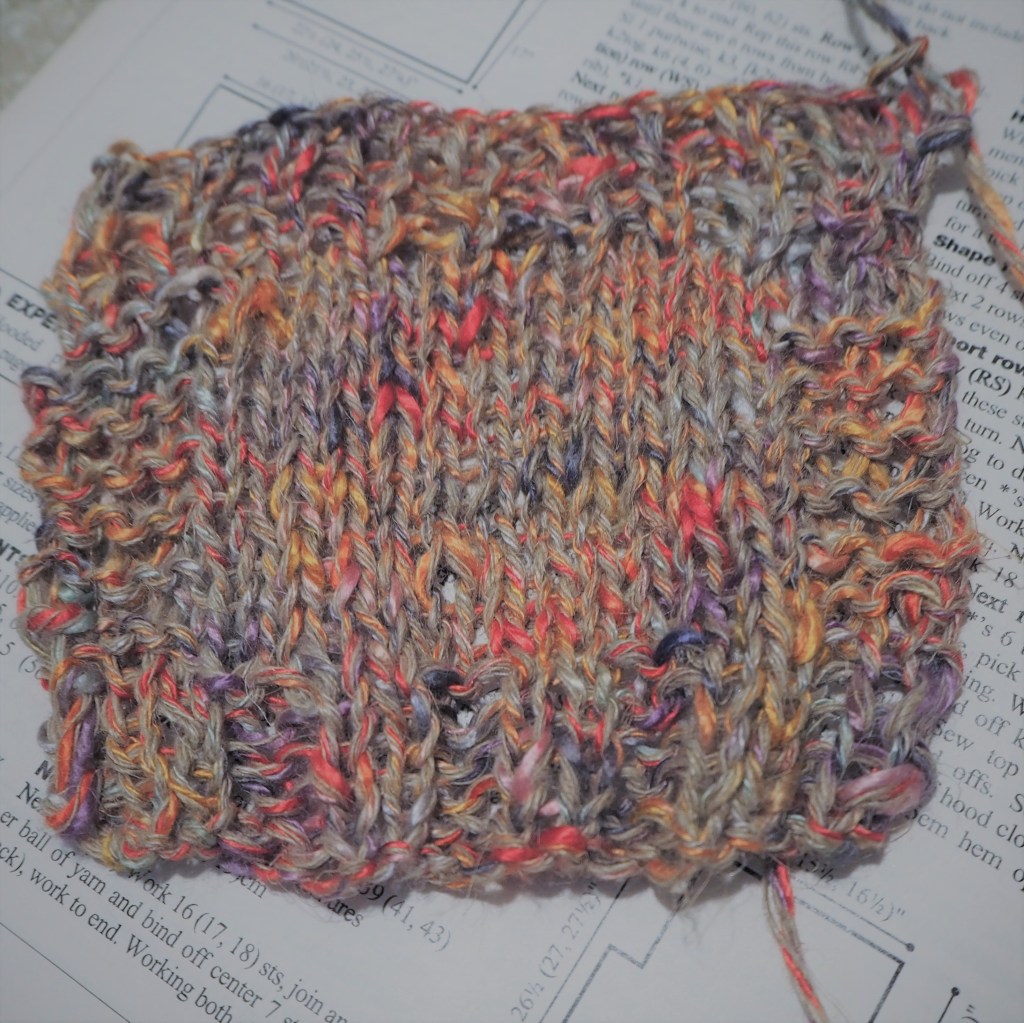
For the Peacock, I started with a DK, then tried a worsted, aran and bulky. What I learned was that because of the variance in the yarn, it ranges from worsted to aran and it is too big for DK and too small for bulky.
Gauge swatch: Now that we have an approximate weight. I recommend knitting a gauge swatch of the matching weight yarn and your “unknown” using the same needles. Measure and compare the swatches.
If they have the same stitches to the inch, you are done. If not, knit a swatch with the yarn that is one size up if your mystery swatch has fewer stitches or one size down if your mystery swatch had more stitches to the inch.
And keep your swatch of the unknown yarn. It will come in handy for determining the care.
Getting the Yardage:
What you will need:
A yarn swift (I’ve also used chair backs–anything you can measure around)
Flexible measuring tape
If the yarn is in a skein, a yarn bowl or way to hold it steady while you wind it onto a swift
Method:
If yarn is in a hank, place it on the swift and extend the swift to the maximum size; If yarn is a skein, wind yarn onto the swift (Steps 1 and 3 in image below)
Measure around the swift (Steps 2 and 4 in image below)
Count the number of strands (step 5)
Multiply the number of strands by the number of inches (e.g., 50 strands time 60 inches) and divide by 36 (inches in a yard) (not shown)
In my case, I got 50 strands at 60 inches, so that’s 3,000 inches of yarn. I divided this by 36, to get ~83.33 yards. Keep in mind, yarn is sold by weight not length, so you shouldn’t expect to get a round number. After getting the yardage, I wound it back into a skein (Step 6).
With 17 skeins I actually only have about 1400 yards total and only 833 yards of a single dye lot.
Getting the Care:
As you can see from the yarn label, it says to wash in temperature 30 (F or C?), it is possible to use an iron and it is possible to wash with most detergents, but not bleach. This still leaves a lot of missing information.
There are three (maybe more) ways to determine how to launder the fabric you create with this yarn. They are as follows:
Look on the label. Sometimes “superwash” or similar phrases are there. In my case the yarn came with symbols and these can be looked up online. I’ve included the reference chart below.
Look at yarns with similar composition. On Ravelry there are wealth of yarns which have this information. If you find one of similar percentages, you came mostly rely on this information.
The most foolproof way is to swatch (the same one you made for gauge) and do to it anything you might do with the finished item. Wash, it dry it, dye it, bleach it, etc.
Dealing with Multiple Dye Lots or Sun Damage:
The easiest way to deal with inconsistent dying or sun damage is to group them by color and alternate in your most different skeins, every other row. Another thing that works very well is blending it with another yarn for a marled look. If the color problem is minor, it will be invisible.
Do Try This At Home
It can be hard, these days, to get to your LYS. So, I hope this post helps you use up more of the yarn you already have. I’ll be posting an afghan I’m working where I’m blending vintage yarns in an effort to get something both useful and beautiful by using up my grandmother’s stash.
I LOVE brioche—both the stitch and the bread. I fell in love with fabric the moment I found it in a Vogue Knitting pattern from the Winter 1998/1999 edition. It was pattern #10 which sadly is not online, so I’m happy to have the printed magazine.
Brioche was not new 20+ years ago when I discovered it. It’s been around for centuries and is believed to have originated in the Netherlands for fisherman sweaters. Think Aran Isle only Dutch.
In the hunt to find projects to use up odds and ends of my stash, I looked back at a previous post I made on simplified brioche knitting, but many of the links no longer worked, so this is an update to that post as well as a free scarf pattern in case you want to try it for creating stretchy, beautiful knitwear.
Brioche is almost as simple as garter because it is the same and knitted both directions. And brioche is far stretchier than a standard rib. This means that it will stretch farther sideways than rib patterns. Which makes it great for a horizontal piece, but not good for a vertical one. I learned this the hard way.
As you know, there are loads of Brioche patterns, but few stand out as good references. The good ones use standard knitting terminology instead of BRKs, BRPs, etc. I call these the “brioche without tears” patterns.
Simple Brioche Instructions
In single color, flat brioche, all rows are the same—no matter which way the work is facing. Only the setup and bind off rows are different.
Across any even number of stitches:
Setup Row: (prep for pattern rows) *K1, yarnover (yo), slip 1 purlwise; repeat from * to end of row
Pattern Rows: (repeated row) *K2tog (the slip 1 and yo of the previous row), yo, sl1; repeat from * to end of row
Final Row: (prep for bind off) *K2tog P1* repeat across
Cast off: in pattern (K1, P1)
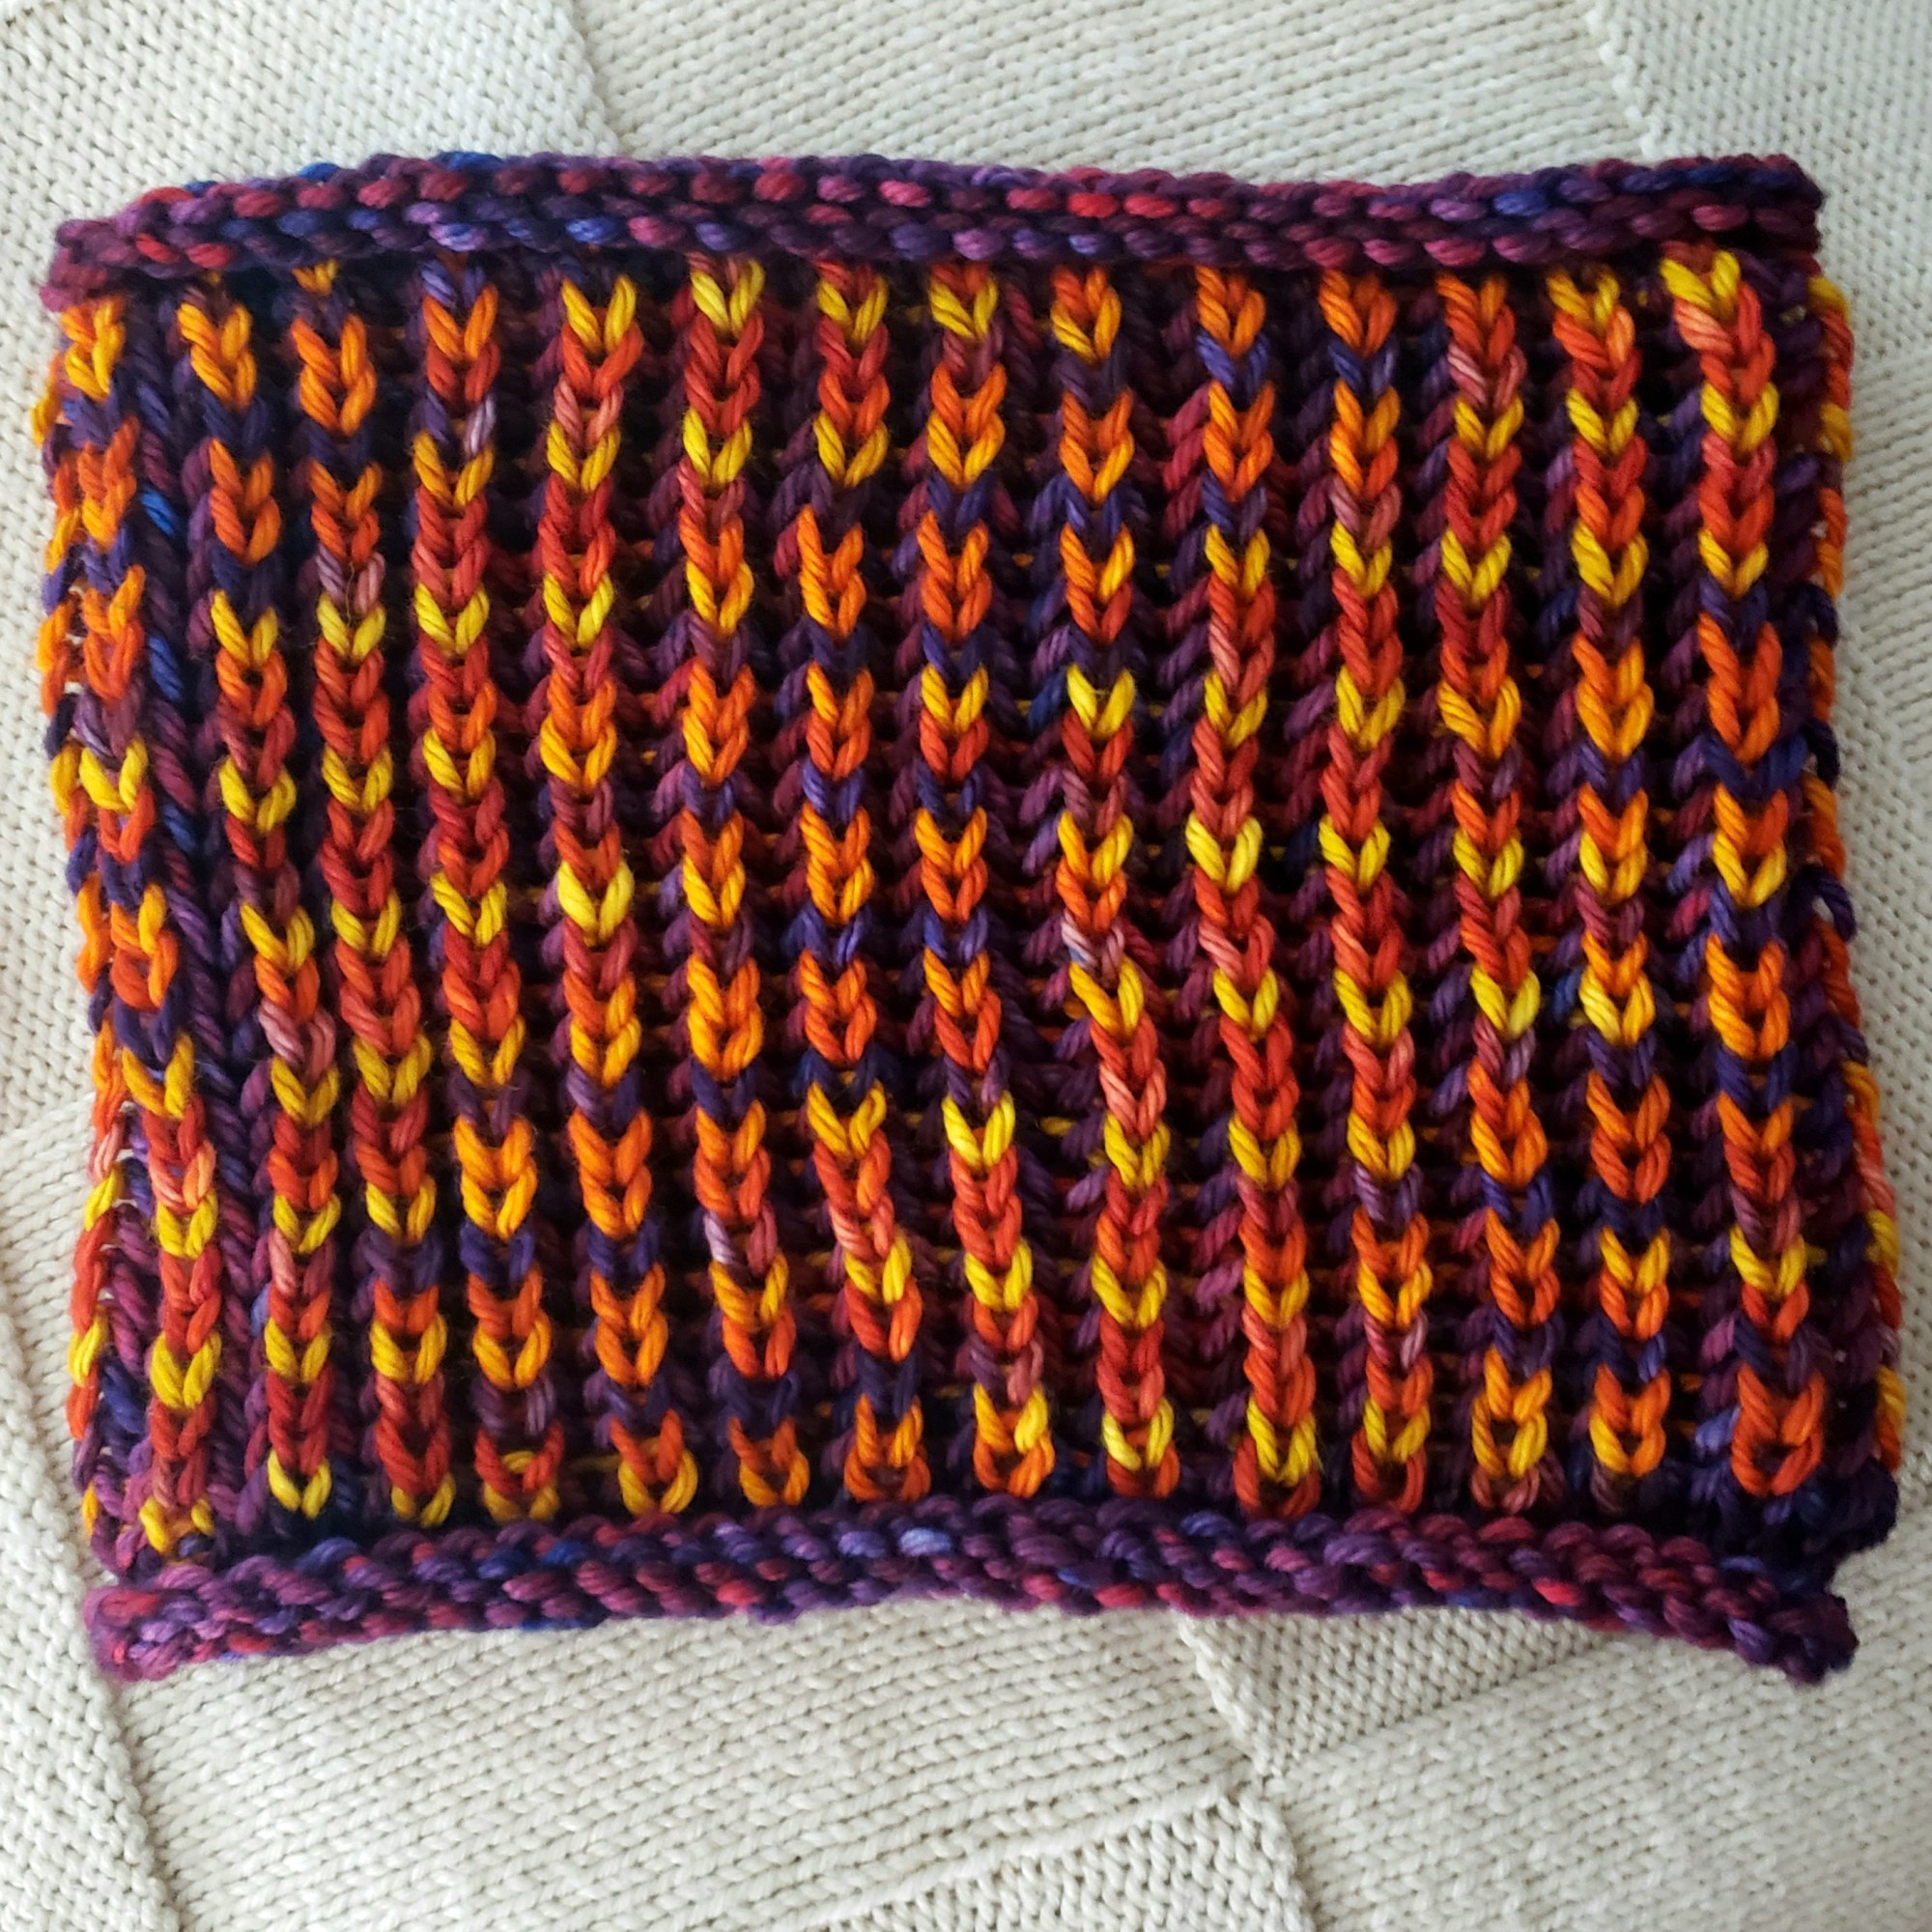
Below is a pattern for a super quick knit scarf that I call 12 Feet of Love. It’s knit in a discontinued yarn called Kitten, by Reynolds, a wool-blend that creates a slightly fuzzy, bumpy fabric that was popular in the 80’s.
This pattern can be any length, width or use any yarn you desire. This makes it a great stash buster project.
Length: As the title suggests, the project I knit was 12 feet including fringe. You can stop at your desired length.
Width: I you want a wider scarf; you can make it wider simply add pairs of (2) stitches until it is the desired width.
Yarn: I used Aran, but this pattern works for any yarn weight. If you use a thinner yarn, add more pairs of stitches, a thicker yarn will require a pair or two less. The best thing is to knit a gauge swatch with the whatever yarn you plan to use.
Supplies:
Needles: Size 9 or whatever gives you the appropriate or preferred gauge.
Yarn: I used 600-700 yards of Aran weight
Darning needle to weave in ends.
Directions:
Cast on 16 stitches.
Start setup row: *K1, yarnover (yo), slip 1 purlwise; repeat from * to end of row
Next row and every row after: *K2tog (the slip 1 and yo of the previous row), yo, sl1; repeat from * to end of row
When the scarf is the desired length, do bind off prep row: P1, K2tog across
Bind off 16 remaining stitches
Weave in ends
If desired, add fringe and trim to preferred length
What’s Next?
I hope the reference is useful for you. I’ll probably expand it to include more and more “conversions” as more as more simple brioche patterns (once again) are made available.
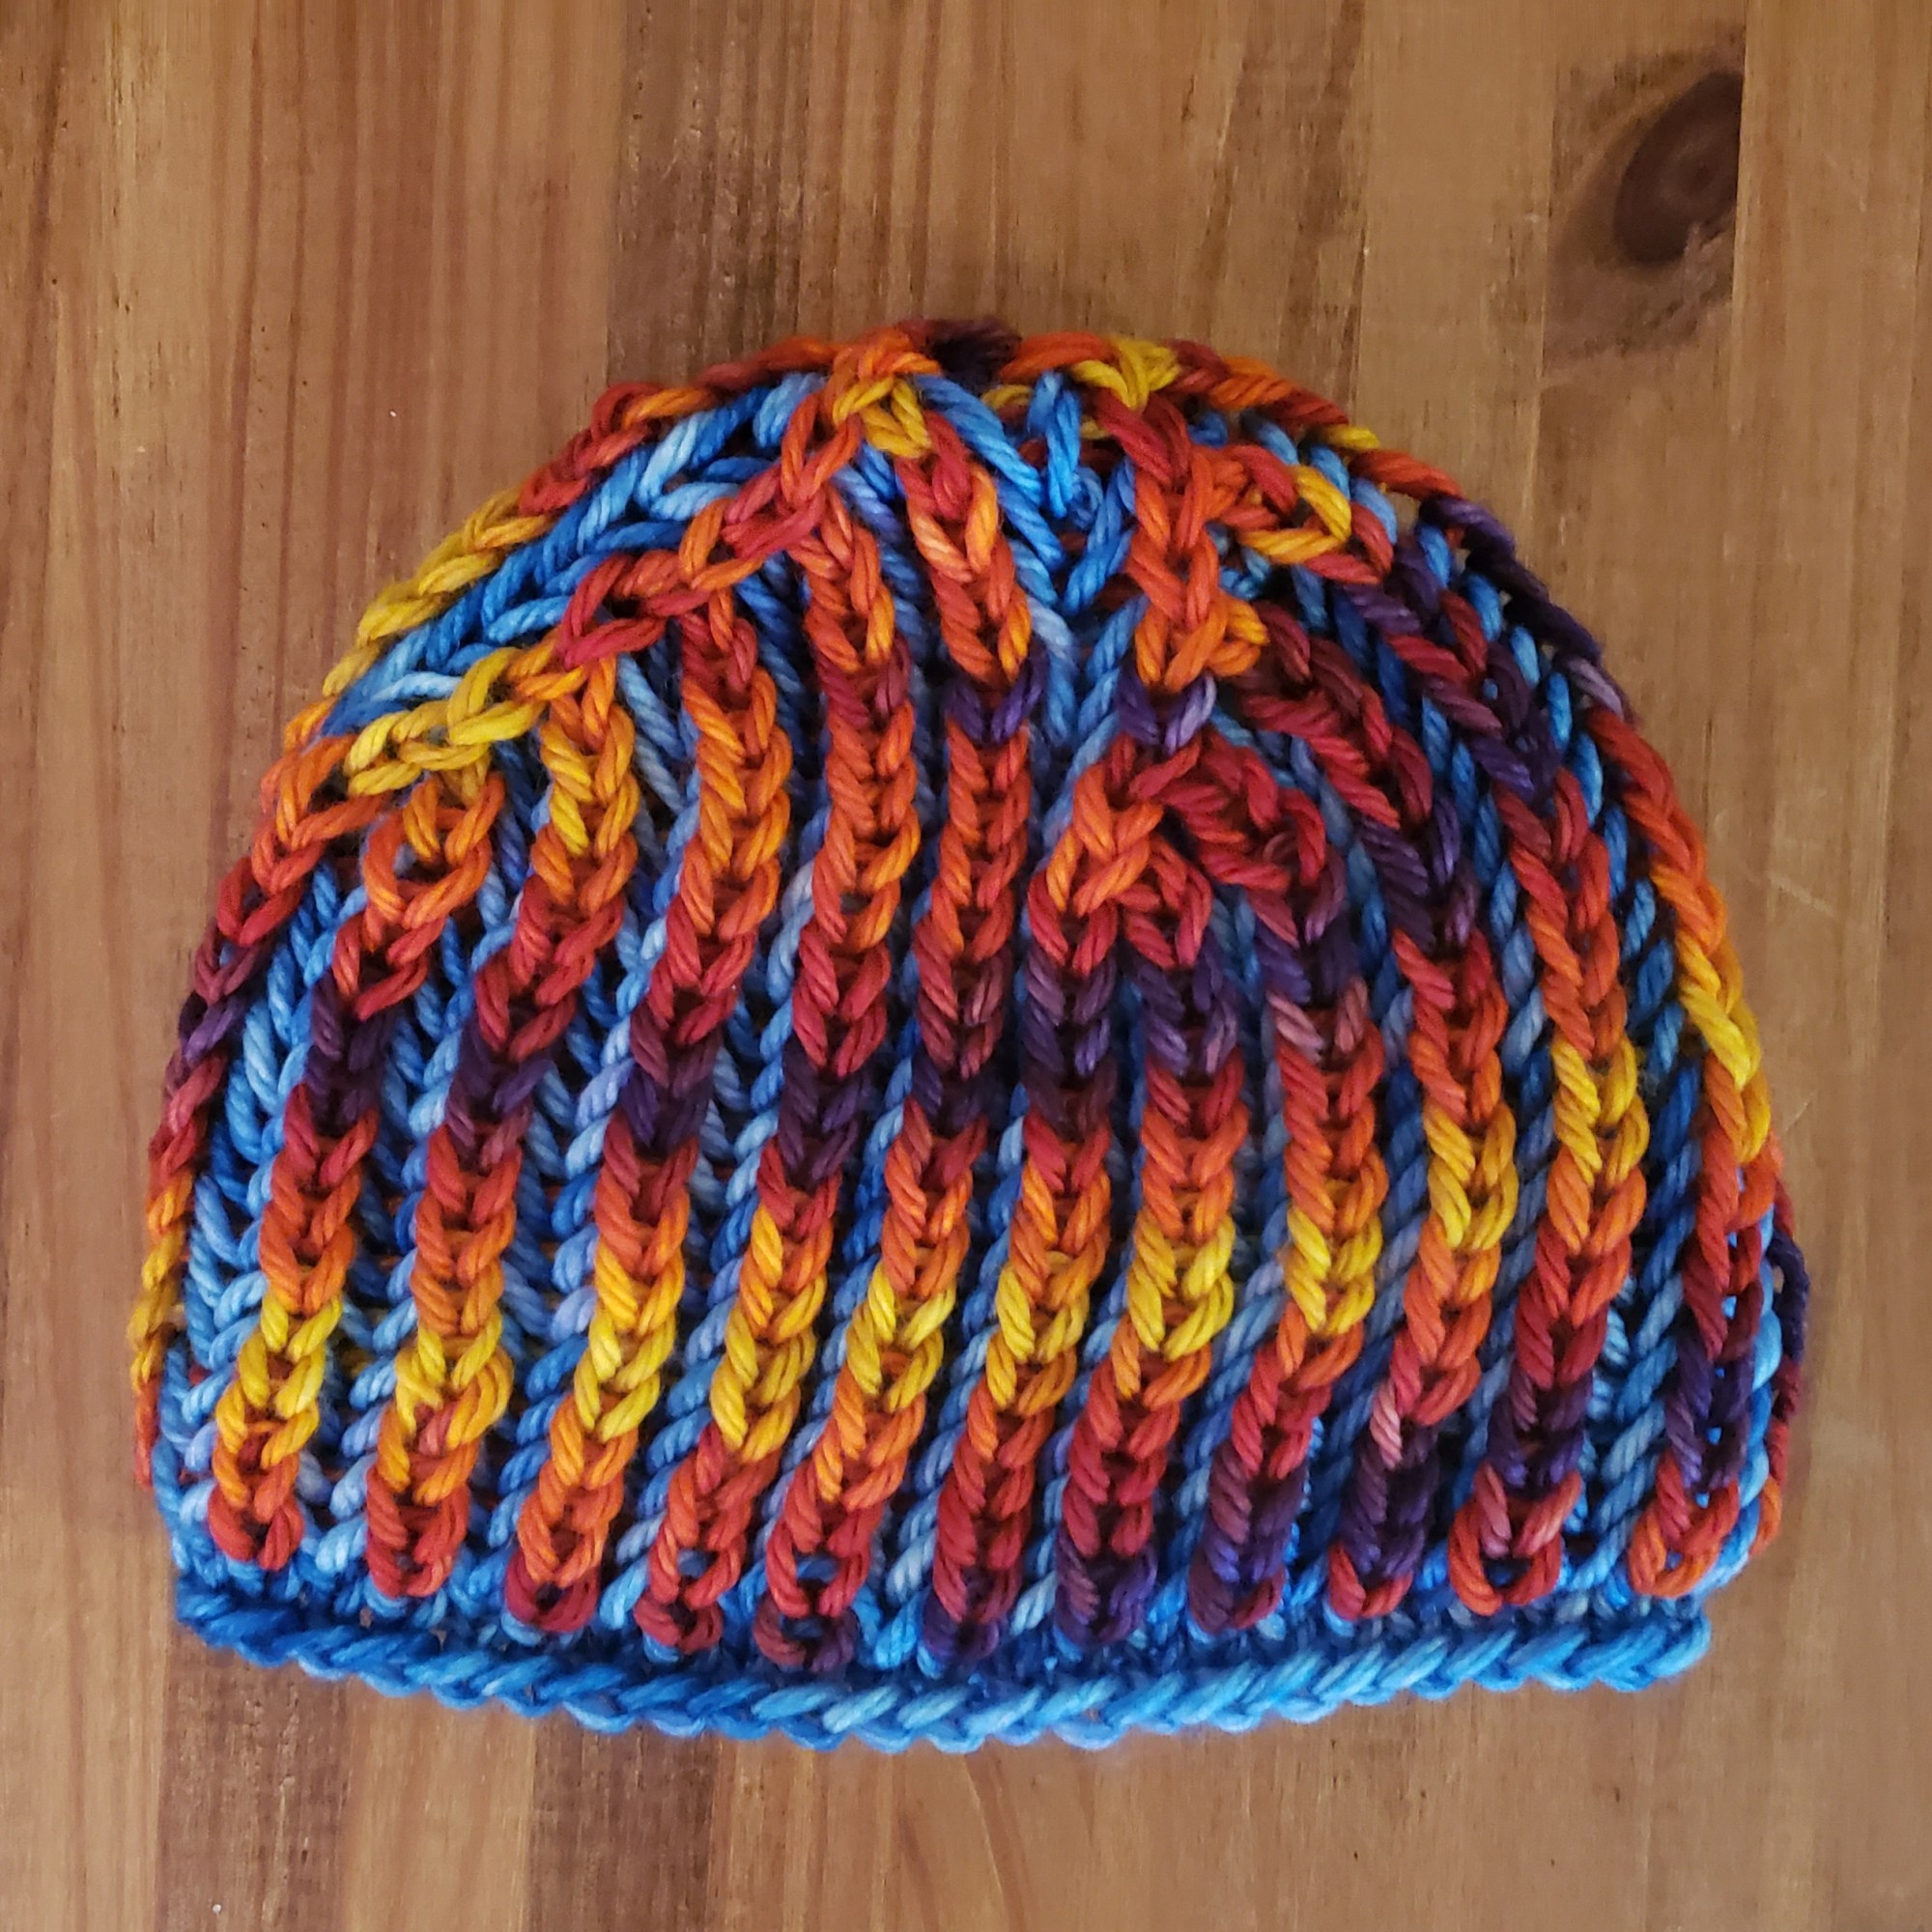
My next big thing is two-color brioche and it turns out that knitting brioche in the round is even easier than two-color brioche flat. Below are a pattern and a video to help without a BRK or BRP in sight!