Brioche Made Simple Reprise

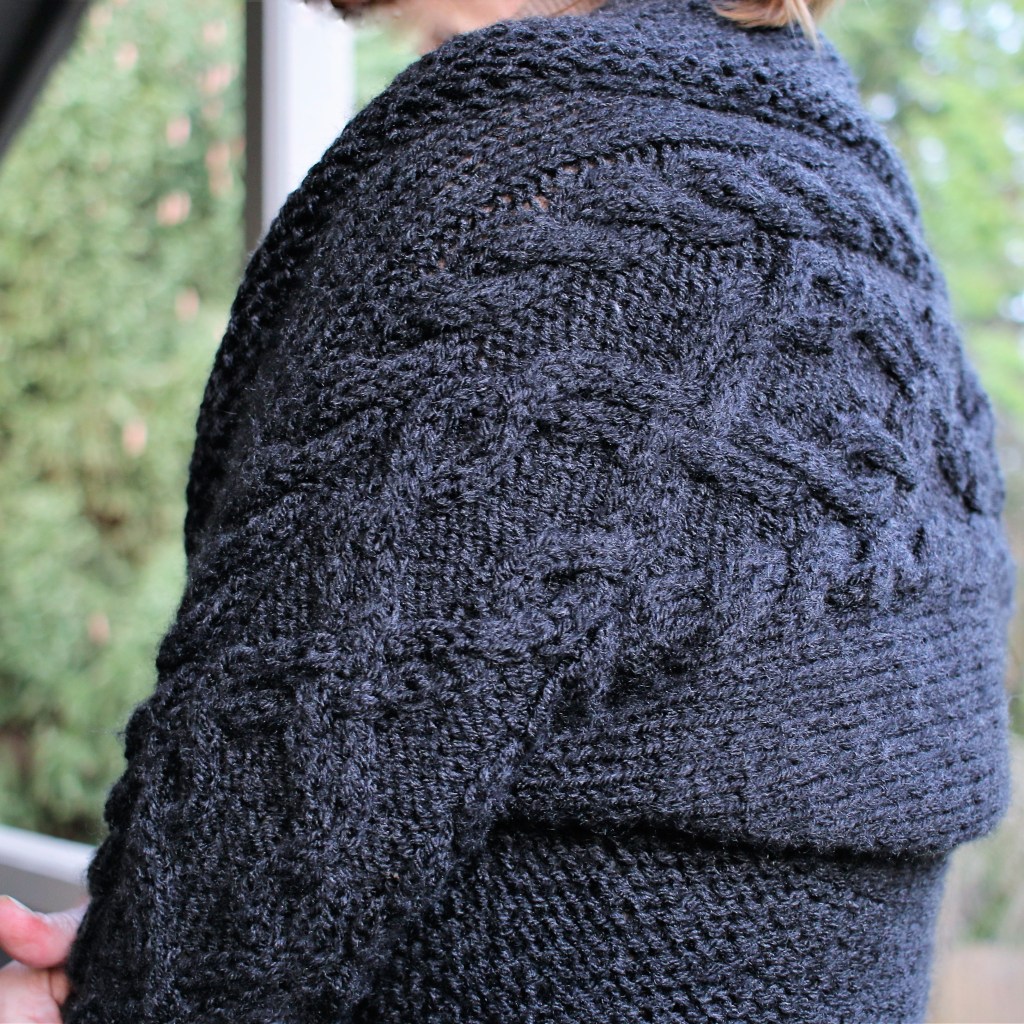
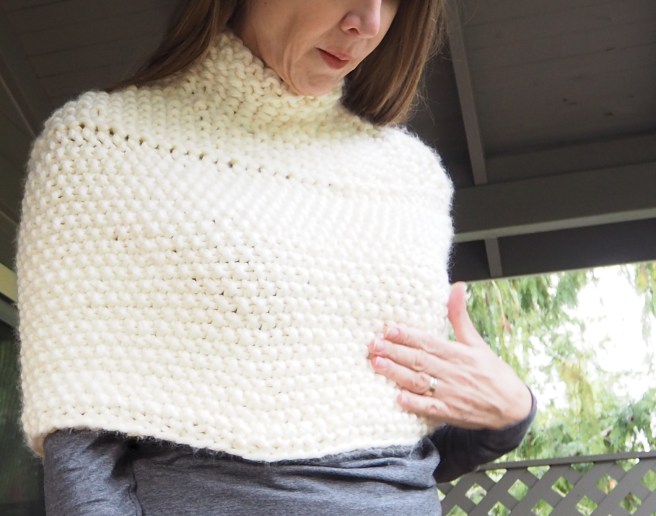
I LOVE brioche—both the stitch and the bread. I fell in love with fabric the moment I found it in a Vogue Knitting pattern from the Winter 1998/1999 edition. It was pattern #10 which sadly is not online, so I’m happy to have the printed magazine.

Brioche was not new 20+ years ago when I discovered it. It’s been around for centuries and is believed to have originated in the Netherlands for fisherman sweaters. Think Aran Isle only Dutch.

In the hunt to find projects to use up odds and ends of my stash, I looked back at a previous post I made on simplified brioche knitting, but many of the links no longer worked, so this is an update to that post as well as a free scarf pattern in case you want to try it for creating stretchy, beautiful knitwear.

Brioche is almost as simple as garter because it is  the same and knitted both directions. And brioche is far stretchier than a standard rib. This means that it will stretch farther sideways than rib patterns. Which makes it great for a horizontal piece, but not good for a vertical one. I learned this the hard way.

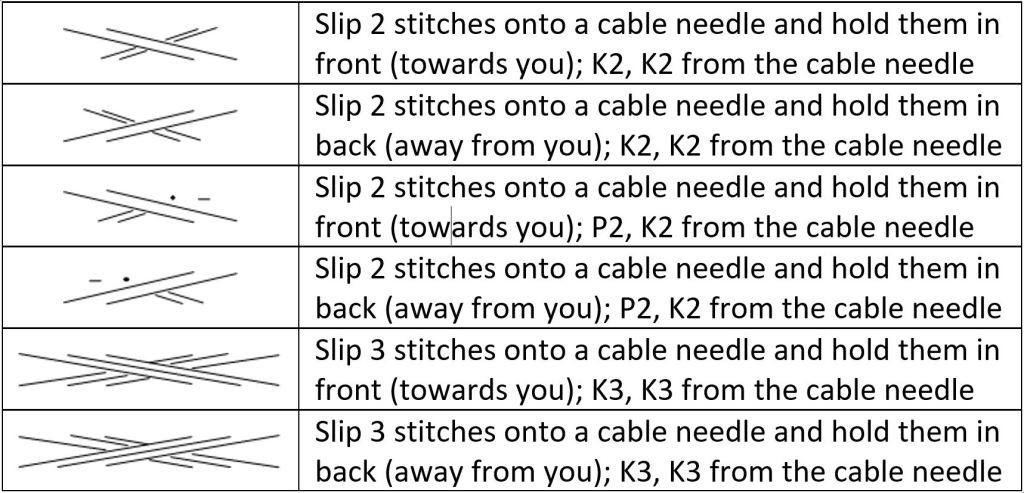
As you know, there are loads of Brioche patterns, but few stand out as good references. The good ones use standard knitting terminology instead of BRKs, BRPs, etc. I call these the “brioche without tears” patterns.

Simple Brioche Instructions

In single color, flat brioche, all rows are the same—no matter which way the work is facing. Only the setup and bind off rows are different.

Across any even number of stitches:

  • Setup Row: (prep for pattern rows) *K1, yarnover (yo), slip 1 purlwise; repeat from * to end of row
  • Pattern Rows: (repeated row) *K2tog (the slip 1 and yo of the previous row), yo, sl1; repeat from * to end of row
  • Final Row: (prep for bind off) *K2tog P1* repeat across
  • Cast off: in pattern (K1, P1)

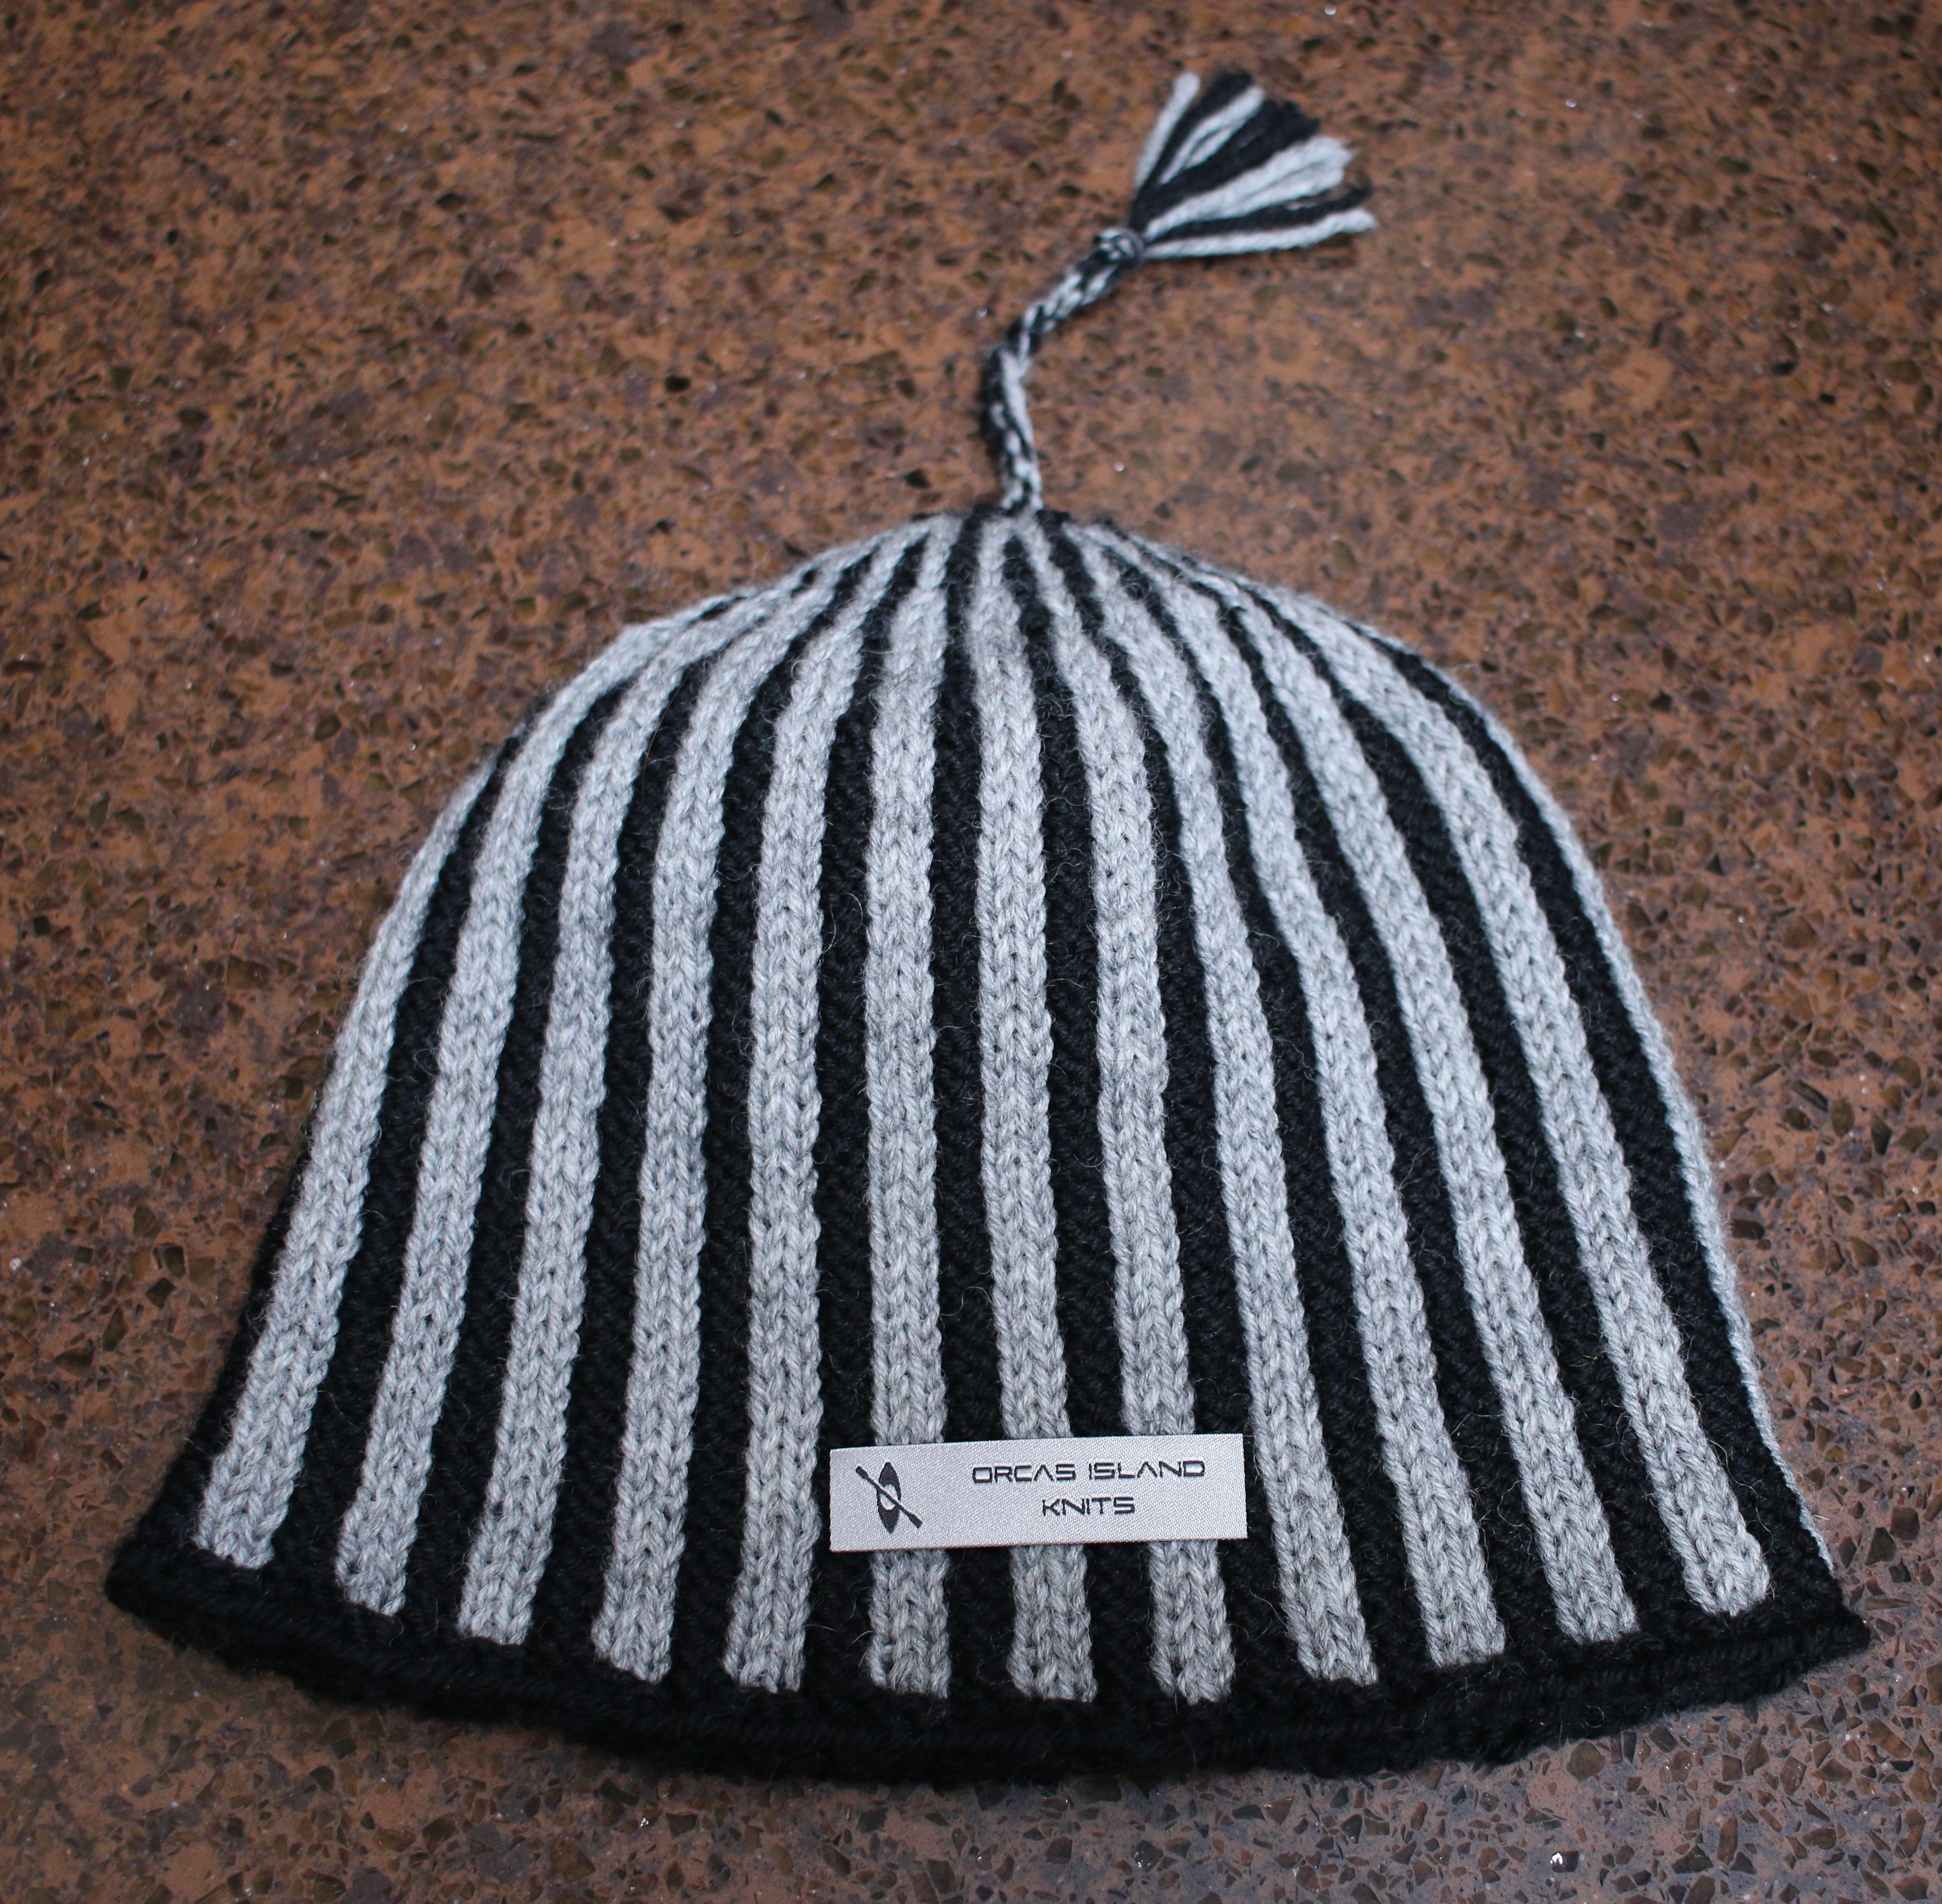
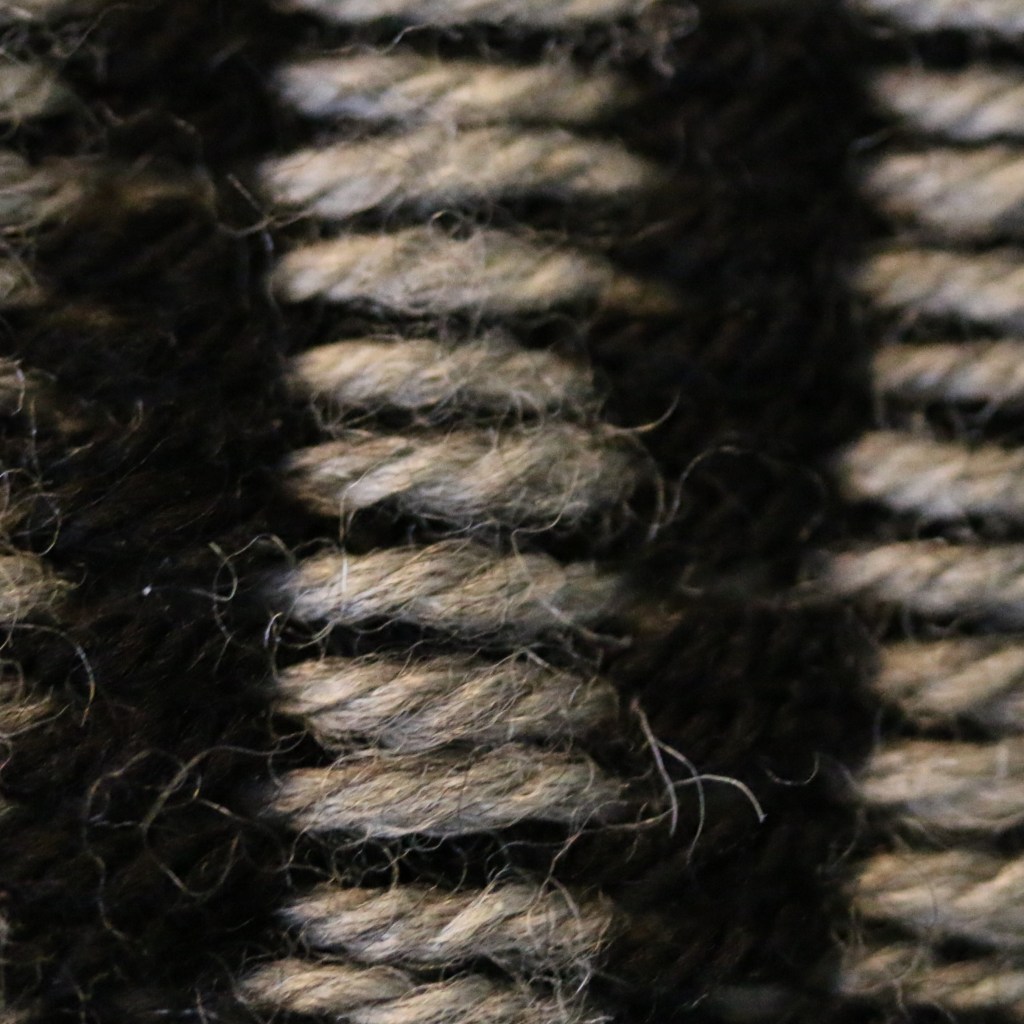
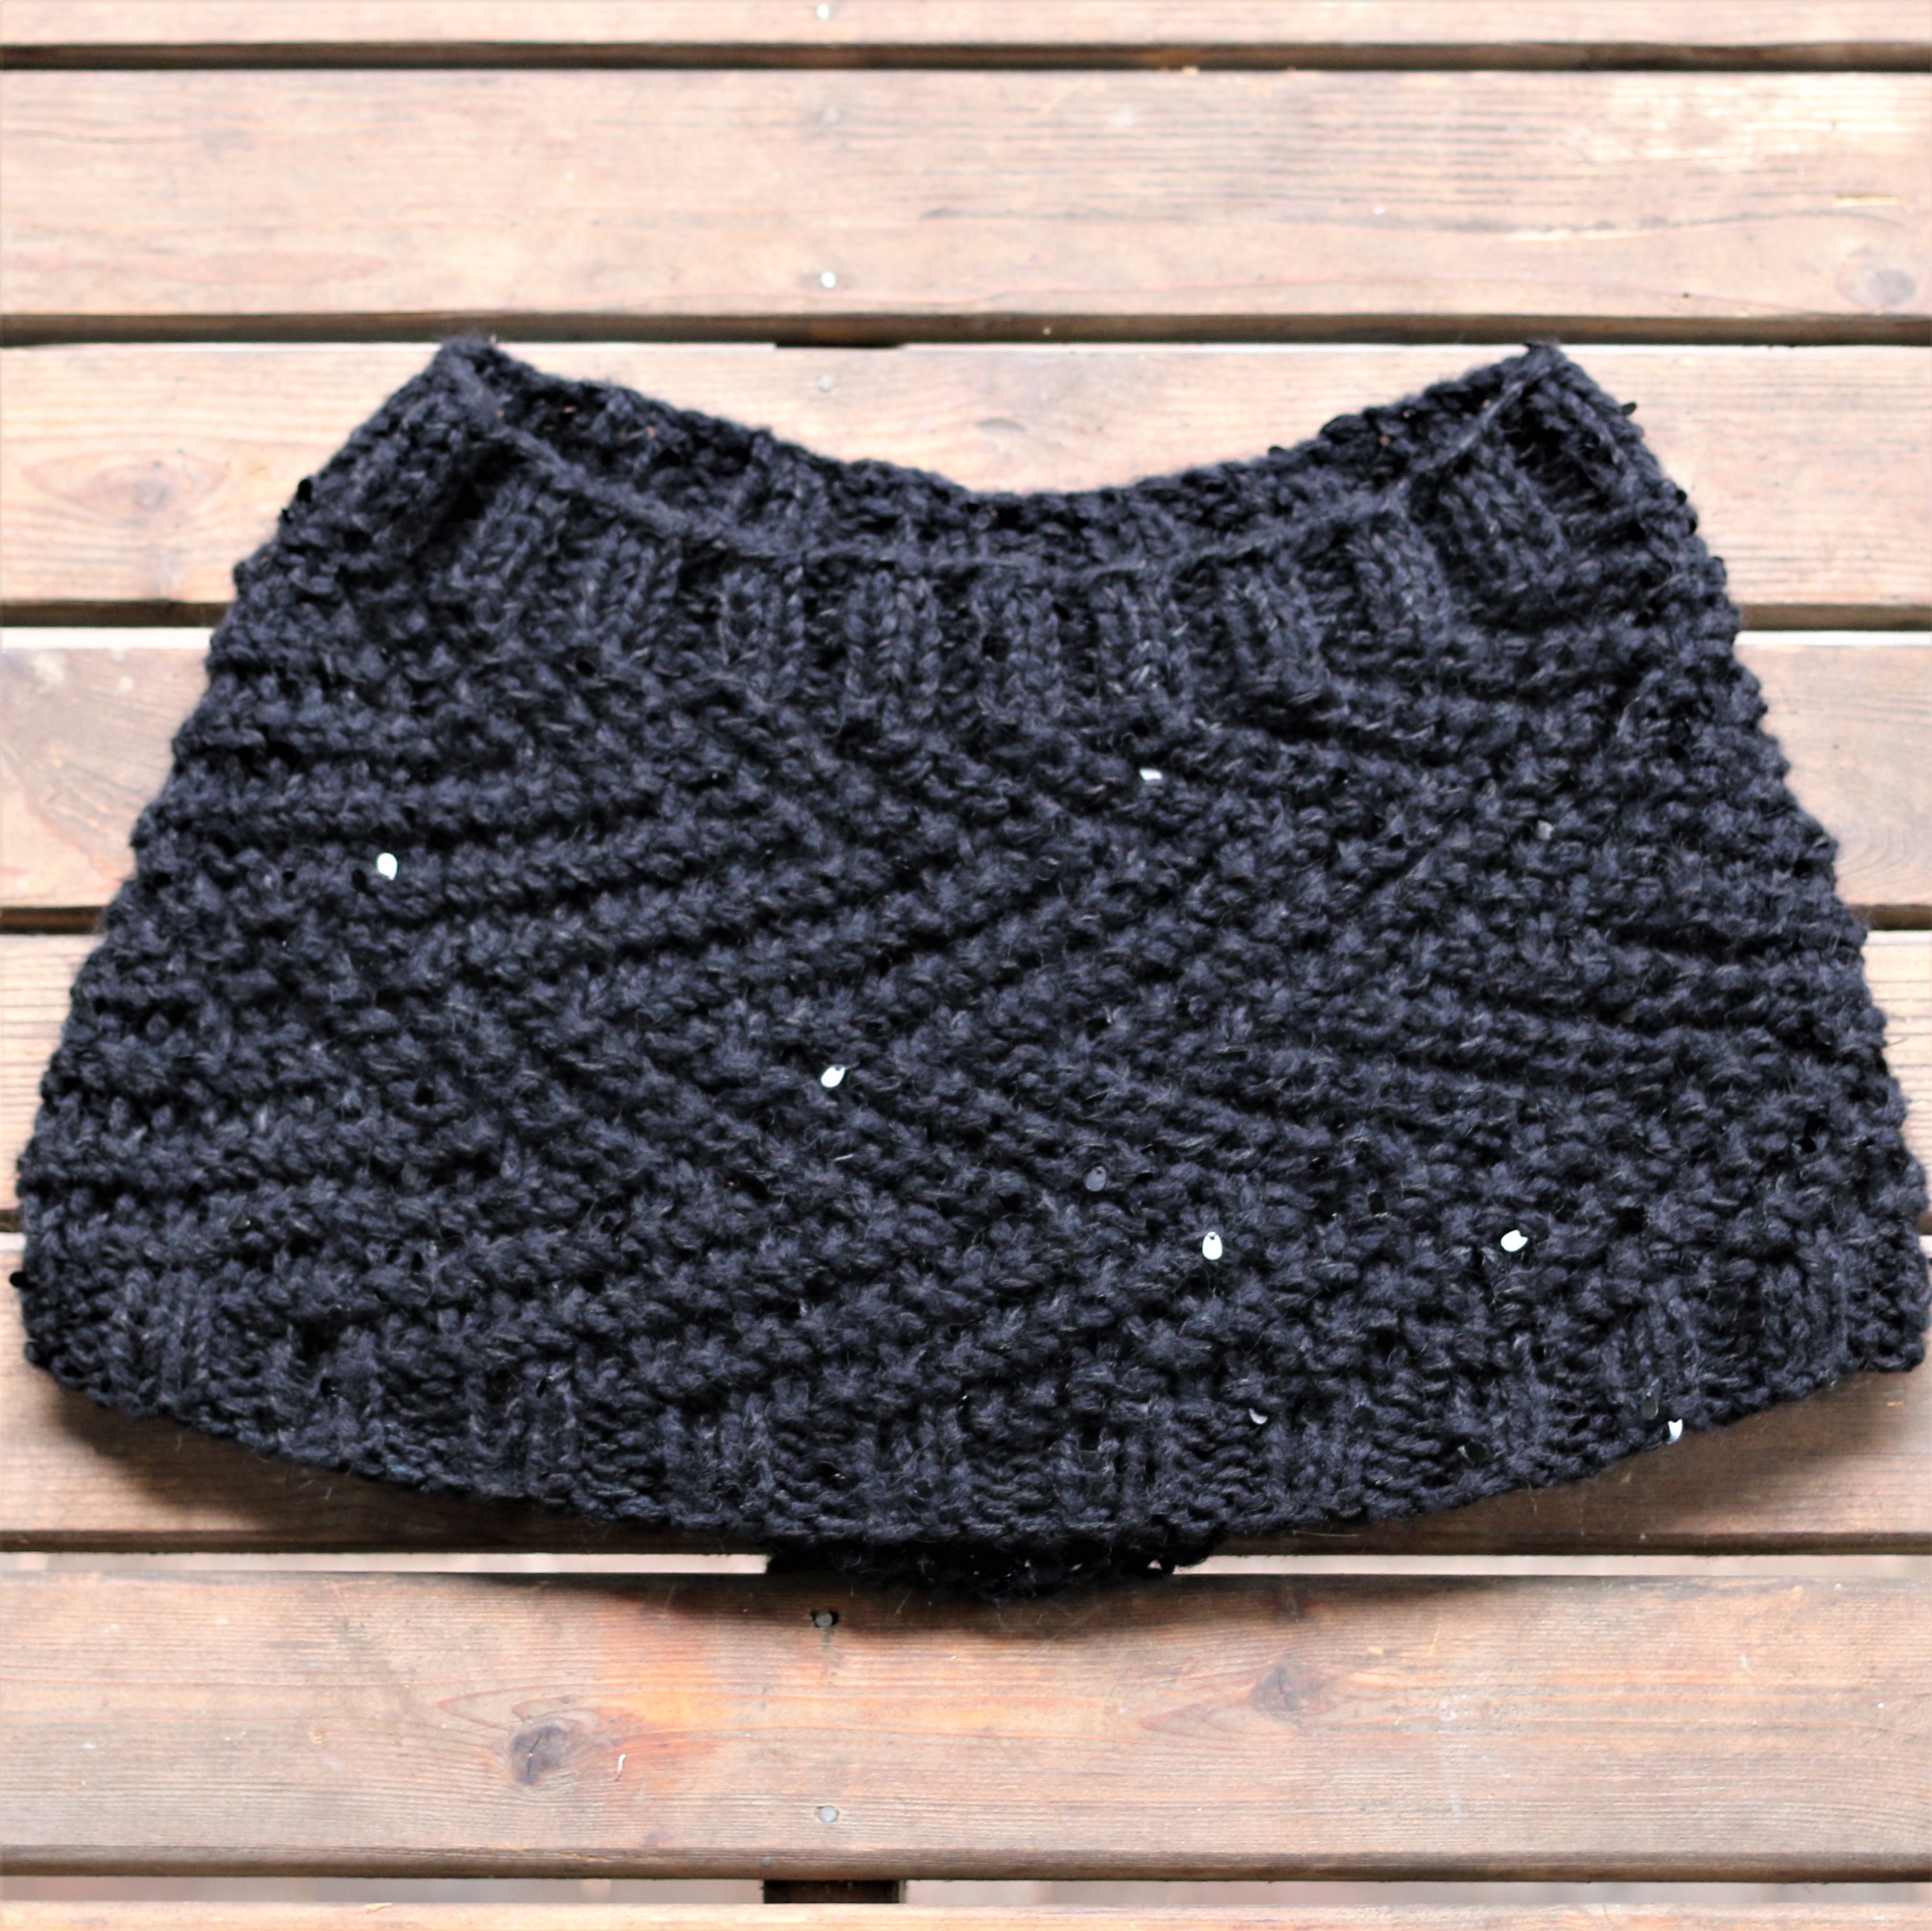
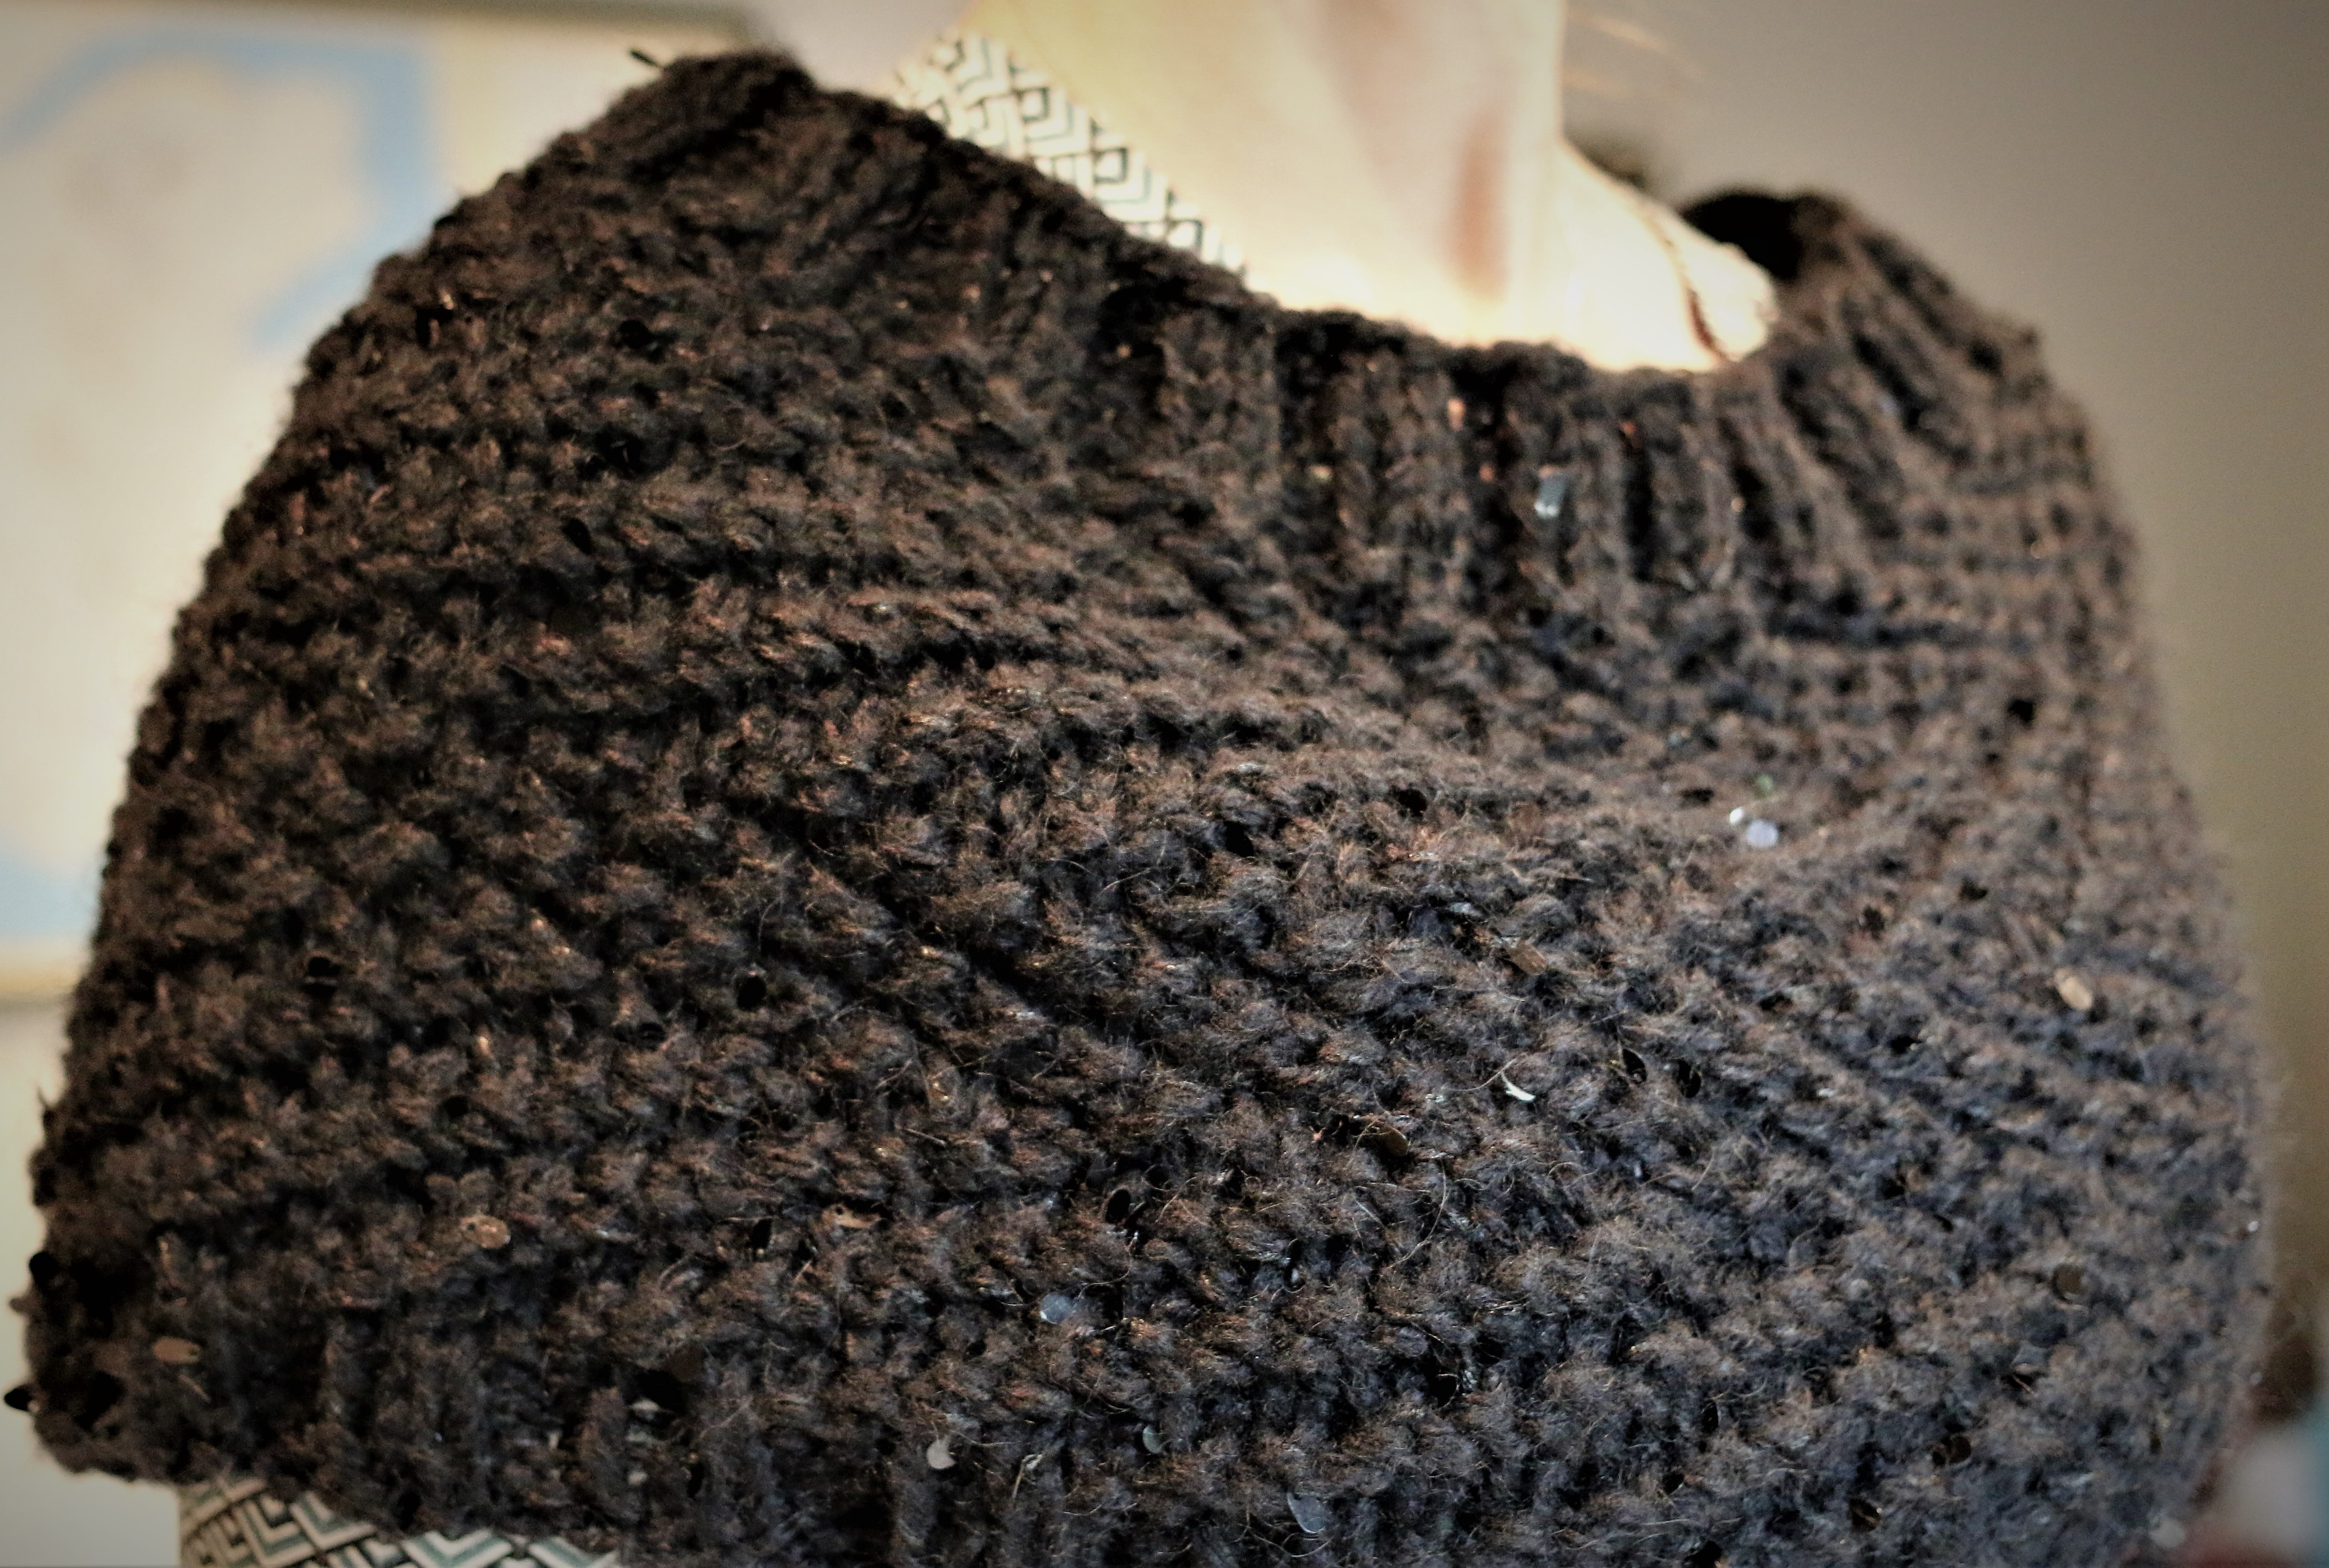
Below is a pattern for a super quick knit scarf that I call 12 Feet of Love. It’s knit in a discontinued yarn called Kitten, by Reynolds, a wool-blend that creates a slightly fuzzy, bumpy fabric that was popular in the 80’s.

12 Feet of Love Scarf

This pattern can be any length, width or use any yarn you desire. This makes it a great stash buster project.

Length: As the title suggests, the project I knit was 12 feet including fringe. You can stop at your desired length.

Width: I you want a wider scarf; you can make it wider simply add pairs of (2) stitches until it is the desired width.

Yarn: I used Aran, but this pattern works for any yarn weight. If you use a thinner yarn, add more pairs of stitches, a thicker yarn will require a pair or two less. The best thing is to knit a gauge swatch with the whatever yarn you plan to use.

Supplies:

  • Needles: Size 9 or whatever gives you the appropriate or preferred gauge.
  • Yarn: I used 600-700 yards of Aran weight
  • Darning needle to weave in ends.

Directions:

  • Cast on 16 stitches.
  • Start setup row: *K1, yarnover (yo), slip 1 purlwise; repeat from * to end of row
  • Next row and every row after: *K2tog (the slip 1 and yo of the previous row), yo, sl1; repeat from * to end of row
  • When the scarf is the desired length, do bind off prep row: P1, K2tog across
  • Bind off 16 remaining stitches
  • Weave in ends
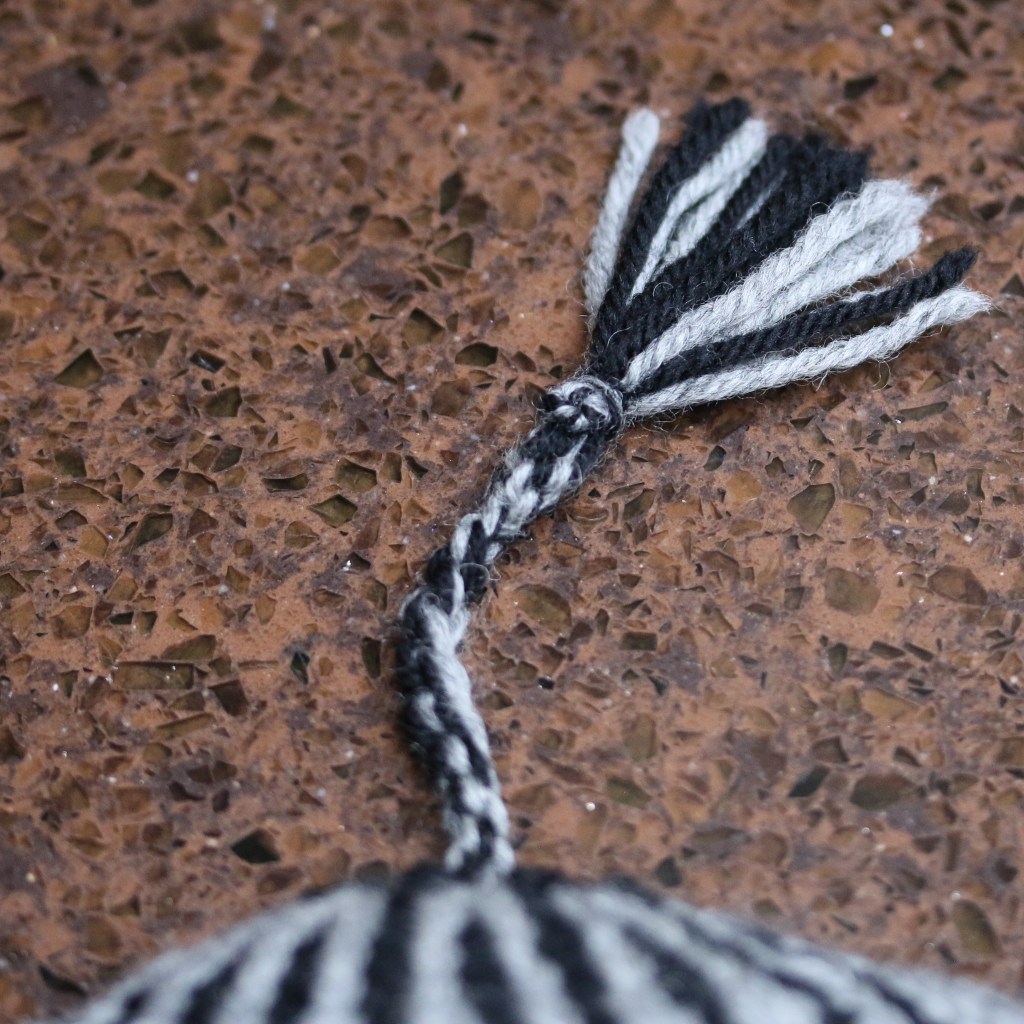
  • If desired, add fringe and trim to preferred length

What’s Next?

I hope the reference is useful for you. I’ll probably expand it to include more and more “conversions” as more as more simple brioche patterns (once again) are made available.

My next big thing is two-color brioche and it turns out that knitting brioche in the round is even easier than two-color brioche flat. Below are a pattern and a video to help without a BRK or BRP in sight!

Pattern: Joann’s two-color cowl

Two-color brioche cowl video tutorial: Milk Shed: Easy two color cowl video (knits and purls only): https://www.youtube.com/watch?v=LRt0i1dQfJc

I’ll let you know how it turns out!

Call to Action!!!

If you know of other brioche patterns using standard knitting terms, I’m collecting them, so please share!

Chart for the Watson Shrug

I’ve been getting some pings about the Watson Shrug I created because it doesn’t use the chart that was provided in the original pattern from Crystal Palace Yarns (sadly now closed). I believe you can still download the Aran Cabled Shrug as a PDF from Ravelry HERE.

This chart is for the 36-stitch repeating cable pattern I used instead of the one in the original pattern. I changed it because I don’t like looking at, or knitting, bobbles.

The delay in sharing is that the chart, my first ever, was originally done on graph paper with pencil (which I threw out—head shake). To share it I needed to digitally recreate it. Thankfully, in the project photos, I took a partial picture of the graph when I posted it. With that photo and the shrug as a reference, here is the pattern.

This cable pattern is over 36 stitches and repeats every 24 rows. All cabling is on odd numbered (right side) rows and all rows except the first and the middle row, have cables.

Pattern Key:

Watson Cable:

As I mentioned, with color patterns, in an earlier post, charting is hard. My hat goes off to those designers that not only create charts for the rest of us, but no doubt, like me, swatch them too. I have a newfound appreciation for the designers that use color and cables (sometime both) in their published patterns.

And please, your feedback is greatly welcomed should you find errors. This time I created it on my computer, so it won’t be so hard to make changes and upload a corrected PDF. 😊

Happy knitting!

A Hat for Gray Days

It’s generally gray in the Pacific Northwest in the winter. Often the outdoors can inspire your color scheme to match.

This winter has seemed particularly dark due to a heavy flu and cold season in the region. What better to ward off illness than to knit and wear warm hats!

I started this hat without a pattern—I just wanted a black and gray striped hat. At first I thought of doing a jogless horizontal stripe, a pattern I picked up at KnitFit from designer Lisa Ellis. Instead of starting off that way, I decided I wanted a larger ribbed edge and liked the idea of doing it in two colors. But when I’d finished the ribbing, I thought, ‘Why not keep on going?’

I’m sharing the recipe right away, since I usually put it off and don’t do it. I’m trying to be a “finisher” this year, even in my pattern writing.

Following other DK patterns, I started by casting on 80, then 88, but both seemed small even for my small-sized head. I’m guessing the extra bulk comes from holding two yarns together. In the end I landed on 100 for a medium size adult hat. For a bigger or smaller size, I suggest adding or removing eight stitches (pattern can be any multiple of four).

The goal was to create a warmer hat and this design achieves it because the carried yarn creates a textured heat holding layer inside.

Contrasting Colored Ribbed Hat

This pattern should work well for any DK yarn—or for whatever meets the stated gauge. If you use wool, as I did (Patons North America Classic Wool DK Superwash), I recommend superwash and high contrast colors, with the lighter/brighter shade for the knit stitches and the darker/dimmer color for the purls.

Glossary:

  • MC – Main color
  • AC – alternate color
  • PM – place marker
  • SM – slip marker
  • DK – double knit weight yarn
  • K2P2 – Knit 2, purl 2
  • P2K2 – Purl 2 knit 2
  • P2Tog – Purl two together
  • K2Tog – Knit two together
  • CO – cast on

Gauge: 21 stitches and 14 rows over 4 inches

Needles: Size 5 circulars (16”), size 5, 4 and 3 double points for crown; medium (G) crochet hook (optional)

Yarn: 150 yards MC yarn; 100 yards AC yarn in DK weight

Recipe:

CO 100 sts with MC (darker) yarn and PM.

Row 1: With MC only P2K2 the first round being careful not to twist

**NOTE**: Row 1 is different from all the other rows switching purls for knits and knits for purls in order to prevent the purl bumps from the MC/AC color showing on the outside of the hat. But you need to do a rib–even on the all MC row to prevent the hat brim from curling.

Rows 2 through 44 (or until piece measures 6.5 inches): holding MC yarn in back, K2 with AC, place AC yarn in back and P2 with MC. Repeat these K2P2 in alternating colors until you reach the marker and SM.

Row 45: K2, P2, K2 in color. P2Tog. Repeat until you reach the marker and SM

Switch to size 5 double point needles on next round.

Rows 46-47: follow color pattern, Knitting the AC knits and purling the MCs purls.

Row 48: in color pattern, K2, P2Tog twice, K2P1. Repeat until you reach the marker and SM

Rows 49 and 50: K2P1 in color pattern

Row 51: K2tog P2, K2P1 twice in color pattern. Repeat until you reach the end and SM

Row 52 and 53: follow color pattern

Row 54: K1P1, K2Tog, P1, K2tog, P1. Repeat until you reach the end and SM

Rows 55 and 56: K1P1 in color pattern (50 stitches)

Switch to size 4 double point needles on next round.

Row 57: K1, P1, P2tog (with MC). Repeat until to end.

Row 58: K1P2 to end

Row 59: K1P2Tog to end

Switch to size 3 double point needles on next round.

Row 60: K1P1 to end

Cut yarn with approx. 18” of each color remaining.

Run the MC yarn through all of the stitches and pull tight and secure. Feed through the center of the hat crown (to the outside).

Finishing: using a medium crochet create a 10-stitch chain and pull the yarn through to secure. Clip 5 four-inch pieces of each color pulling them through the last stitch in the chain. Wrap an additional main color around these pieces to create a tassel and trim to desired length. Weave in ends.

And now for something completely different… The 2 Day Cape

I grew up with Monty Python. As a child I used to belly crawl into my parent’s bedroom and watch lying just at the foot of their bed. Sometimes I’d give myself away by giggling. This week I needed a giggle.

Home from work with the flu and just done with yet another pair of socks, I needed a knitting pick me up. Even so, I also had to have a small knitting project for flying from Seattle to Florida for Christmas, so I cast on the next pair of socks, this time for dad. And then was too sick to travel. Grumpy didn’t do my mood justice.

Even pouring over online yarn stores didn’t help, so I decided I should look at my queue. That’s when I hit on the pattern Hott Pink. Though the color was off and the design too busy for my liking, it reminded me of the beautiful bespoke cape dress Meghan Markle wore on her solo trip with Queen Elizabeth II.

I’d bought the yarn a year ago with this project in mind. If anything, I was overdue to work on something just for me.

After gauge checking with a swatch, I went up a needle size to create a bit more give in the fabric. I also made it a bit smaller around, only 42 inches to give a more fitted look. To make sure that it was easy on and off, I kept the design element of ribbing, but went with K1P1 to match better with the seed stitch.

Surrounded by a mountain of notions scattered on my bed, in two days, with only a few backing up (many to get the fit just so) I finished. So much faster and more satisfying than two months for a pair of socks!

Here’s how it turned out! So pleased!

A Logo — Finally!

Being more technical than artful—an odd thing to say about a crafter, but I’ve always felt it to be the case—I was trying to work with various graphic artists on a logo. Since these folks were also friends, it just never seemed to rise to the top of their “to do” list, even though I was a paying customer.

Well, I finally took it upon myself to create my own. I’d love any feedback you might have!

OrcasIslandKnitsLogo

Variation on a Theme

My Quickie Caplet pattern keeps taking on “new life”. It’s such a simple pattern that you can do pretty much anything with it and still come out with a handy shoulder warmer.

IMG_5440.JPG

This one is for a co-worker of mine. I’m calling it Swanky Caplette since one of the yarns is Red Heart’s Swanky which adds a bit of sparkle when the light catches the little metallic beads in the yarn.

I started out using a pattern from Sequence Knitting a K2 P2+1 modified rib—and planned to make it a spiral, but on a decrease row I must have had a reversal, because I realized the following morning after a night knitting session in front of the TV, that it was spiraling the other way.

No worries! I just counted the rows and completed another set before turning around and going the original direction—and Voila! It looks like I meant to do it that way, no?

Welcome to my world of ad hoc knitting! I love creating a unique piece every time!
IMG_5432-retouch.jpg

By the time you read this, I’ll be in Italy hopefully hitting some of the great knit shops in Milan. It’s my first time to Italy and I cannot wait!

Dr. Seuss Capelet Pattern

This pattern is based on my Quickie Caplet pattern. As with that one, it holds multiple yarns together and uses big needles to make it a quick, fun knit. The one pictured above is the Long length. All versions have three “furry” rows, but in the medium length version, they are narrower and the collar is slightly shorter.

Why Dr. Seuss? Well, you can dress it up a bit by bunching it up over a frock and you might resemble Seuss’s character Foona-Lagoona Baboona. If you wear it poncho style over casual clothes or a jacket you’ll fall somewhere between the Dr. Seuss birds the Goo-Goo Goose or a Pelf.

Enjoy!

Downloadable pattern: 2017-dr-suess-caplet

Needles: a 32” circular needle–size 17.

Yarns: 2 skeins Red Heart Super Saver and 3 skeins Red Heart Fur Sure

Gauge: stockinette holding two strands of Red Heart super saver together 7 sts over 4 inches

Fuzzy rounds are created by holding one strand of Fur Sure together with one strand of Super Saver. Plain rounds are created by hold two strands of the Super Saver alone.

Pattern: Medium length (Long length)

Cast on 72 (88) stitches holding one strand fur yarn and one strand worsted plain yarn together. Join yarn to knit in the round, placing a marker.

Continue in the round using a K2P2 rib (all fuzzy rows are ribbed) for 6 (8) rows. Decrease one stitch at marker each row (on fuzzy rows only) to hide reductions.

Row 7 (9) drop Fur Sure and pick up another strand of smooth yarn (two smooth yarn strands held together. Knit in stockinette for 6 (8) more rounds even (do not decrease on smooth/stockinette rows to hide decreases).

Repeat rows 1-12 (1-16)

Row 13 (17) drop one strand of smooth yarn and pick up the furry strand. Rib for 6 (8 rows). Decrease one stitch at the marker each row.

Row 19 (25) Drop furry yarn and holding two smooth yarns together knit in K2P2 rib for 10 (14 rows). Do not reduce.

Row 29 (39) Cast off loosely

© Kristin Tolle. This pattern is freely available and without restriction to all would be capelet makers and Dr. Seuss lovers!

Copyright, Creativity and Crafting

The song Donna Summer song “She Works Hard for the Money” is rolling around as I write this post. And work hard I do. And in spite of this, I’ve mentioned I wanted to start selling my extra produce at the local resort. Well, they’ve put me off just long enough that I’ve gotten the message—not interested. They are nice people, they just to keep things neighborly. So rather than say “No”. It’s always, “We’ll get back to you.” Only they never do. So I’m looking for a new outlet.

Happily, many of the samples I knit up fell into the hands of my family members for Christmas, saving me a huge amount of time shopping and bringing lots of joy. The other reason I didn’t sell them was that I noticed (and wrote about) that some of the items had the stipulation that they “cannot be used for commercial use”. I assumed this referred to the knitted garment, but a person posted on that blog I should read up on it because that was not the case citing US copyright law.

I didn’t have time to check it out at the time, but this weekend I decided to research and found out—they are quite correct. According to US copyright law, this stipulation cannot apply to “useful articles” produced following a recipe or pattern. The UK (of course!) has a similar rule specific to knitting and croquet items.

You certainly don’t have to take my word for it–after all, I may have many advanced degrees, but I’m no lawyer. So here’s where you can read up on it yourself:

You might also find a couple of articles helpful to parse the legalese. I really appreciated Jason M. Krellenstein’s brief description in his “Ask a Lawyer” column in Vogue Knitting Spring/Summer 2012 issue. To summarize: any statement about “no commercial use” in a pattern has no legal precedent and is unenforceable on knitted items. This article, from 2014 in “Plagiarism Today”, spells out in understandable detail why socks, hats and sweaters fall under “useful objects” and can therefore, not be restricted by a designer.

The bottom line: A designer cannot, as of this writing, legally enforce a “no commercial use” clause in the UK commonwealth (Canada, Australia, South Africa, India, etc.) or in the United States on articles generated by following the pattern.

In retrospect this makes sense. The pattern and all the hard work that went into creating it belongs to the designer—and they should profit from the sale of that pattern. For produced item based on that pattern, a knitter’s cost of materials, time and effort, modifications/customizations belong to the knitter–full stop. Effectively, the knitter may not be restricted from earning a profit on their labor, clause or no clause.

This said, while you (and I) can sell these items (until there is a legal decision to the contrary), be mindful of what the copyright protects–the pattern itself. The law is very clear that this intellectual property belongs to the designer.

A pattern should not be resold or given away, in whole or in part.  A pattern must be purchased and it should not be shared, unless the designer gives you permission. You also cannot reproduce or publish it without express permission. Speaking from personal experience with my own *very simple* designs, designers work hard for the money.

Got the Blues

Boy was I sunny this weekend despite the rain. I finally did it. I talked to the resort next door and asked if they’d carry my knitwear. I’m so excited because they said yes! Then the blues set in.

I’ve considered setting up an online store and decided there was too much competition, not to mention the difficulties and cost to ship from the Island. Living in a vacation destination means people with disposable income visit—frequently. They often want to bring a piece of their experience back, so why not a practical item like a hat scarf, yoga hood, or scarf? Now all I need is a label and I’ve reached out to a local designer for assistance.

For supplies I’ve got scads of grandma yarn (free to me wool) to use for these small portable projects while I’m still commuting and flying around the world for the job that keeps a roof over my head and food on the table. Though I’d never really planned to make a profit, it is still good to have things to keep my hands busy and I’m a bit over hatted, scarved and mitted at the moment. As is my trusty husband.

YogaHood
Yoga Hood I am planning to sell at the resort next door

I’ve already posted about the Yoga hood I cobbled together from gift yarn—which will likely be the first item on sale. The next item I planned to show them was a matching hat and mitts I was making from leftover Tosh DK for my Woolful KAL George Hancock Home and Away sweater in lovely Worn Denim.

The mitts are no problem, because that is my own design. But as I was knitting the waffle hat I pulled out the pattern to look to see the decreases and to my disappointment the pattern says that it can only be used for personal use and non-profit use. And while I wasn’t planning on selling it for a profit (just cost) it seems like that would violate the disclaimer.  

While I completely agree that you should acknowledge where a pattern comes from. I can also completely understand not duplicating it and serving it up as your own design. Which is why the mitt pattern I created refers back to the Violet Waffles hat pattern as inspiration for their design. And while I completely get why you wouldn’t want a huge conglomerate (e.g., The Gap) taking a pattern and mass producing it as their own design, eliminating low-production, in-person sales of garments is a bit hard to understand. After all, the work of knitting it and the materials are my own. That said, this was a FREE pattern. So that might have something to do with it. I’ve written to the designer to ask her thoughts, just to be sure.

I’ll be sure to check this out before I knit up someone else’s design or design something to match. Another lesson learned the hard way!

I guess my sister-in-law will get this set. *sigh*

My First Crochet Project

My Gadabout Bag
My Gadabout Bag

I know somewhere in the distant past I made a few granny squares in Junior High. So you might argue that this isn’t my very first crochet project. So perhaps a better way of describing it is that I’ve just created my first ever *usable* object.

The not-so-little Gad-about bag (I used 64 stitches instead of 48), designed by Dot Matthews, is my newest project bag. The Seahawks colors are unintentional. This is just what I had lying about of similar weight and composition. Though it could be that I’m subliminally drawn to the local sports team colors. I like to think I already liked this combination and that the correspondence is a coincidence.

The bottom of the finished bag inspired my wish to see what more
The bottom of the finished bag inspired my wish to see what more “mistakes” might look like.

My LYM (local yarn manufacturer) is Warm Valley Orchard (WVO) on Orcas Island. When I’ve bought a sweater’s worth of yarn I’ve been allowed to make a free selection from a hank ends pile. So between leftovers from various projects and these hank ends, I was building up quite a stash of unstashable yarns. I find WVO yarns to be stiffer than other yarns. Perfect for a sturdy bag.

I didn’t follow the directions exactly for the bottom, but I followed pretty closely for the top. And though it is clearly too tight in places, I must admit, I prefer the fabric from the not followed section better than the followed. The coil outward reminds me of a Panamanian hat. I wondered what it would look like if I just kept on going…

Bottom of the bag in progress

I was so pleased with my mods, I decided to immediately start on another bag. However I stopped work quickly after the bottom section because I really am anxious to get on with my next big project—a cardigan for me. Finally!!

You might also notice that the colors match fairly well the first project I put into it—my Woolful Summer knit-a-long Home and Away project, which is a combination of a Georgetown and a Hancock sweater from Hannah Fettig’s Home and Away book.

Georgetown-Hancock from Home and Away
Georgetown-Hancock from Home and Away made from Tosh DK in Worn Denim

If you’ve seen this beautiful book, you’ll know that Hancock calls for a sport weight yarn and Georgetown calls for worsted. One is cropped and the other is hip length. One described as a bottom up knit and the other top-down (though directions are provided in both styles for each). About the only thing they have in common is they are cardigans. I love design elements from both, so onward I go.

And as for the yarn. I’m officially madly in love with Tosh DK in this colorway.